
The Trossingen Lyre was uncovered in a 6th century gravesite in modern day Germany, and represents the most complete Anglo-Saxon lyre found to date. After making a prototype lyre out of plywood (links and more info for that coming soon), I decided to try my hand at this more difficult project.
This is an ongoing project, so I will be updating this page as often as I can.
You can read more about the original lyre in the German Wikipedia article about the Trossingen Lyre (English translation).
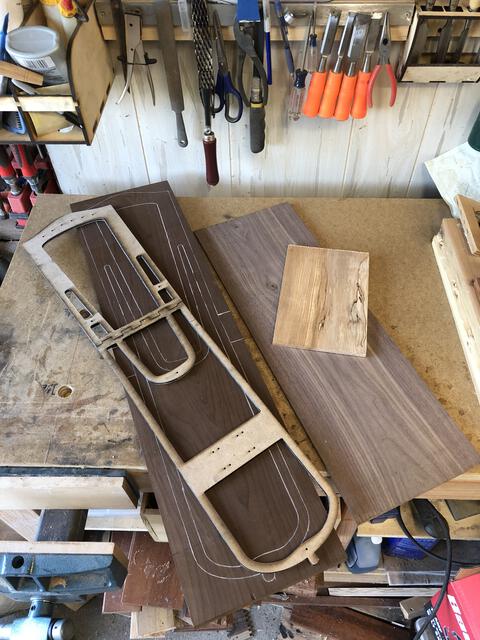
Thanks to the high resolution photos of the lyre from the wikipedia page linked above, I was able to take very precise measurements of the Trossingen lyre (verified against official archaeological descriptions as often as possible) and translate them to one of my favorite CAD programs, with only a few minor stylistic adjustments. I will eventually provide a PDF version of the template that you can print and use for your own project, but in the mean time, you can always view the most up to date version of all of my lyre designs at OnShape (a web search will turn up how to get a free account, as well as their great tutorials for using the app).
Materials
- 6mm MDF for the cutting template
- 4/4 or 5/4 carbonized maple (Cambia makes this by basically cooking the wood until it turns this amazing dark color and gains some more dimensional stability)
- 1/4" walnut from my lumber yard’s scrap pile
- 1/4" spalted maple from a local tree
- 3/4 hard maple for the bridge, tuning pegs, and a couple of pins in the lyre body
- Fluorocarbon lyre strings from Michael J King
Shaping
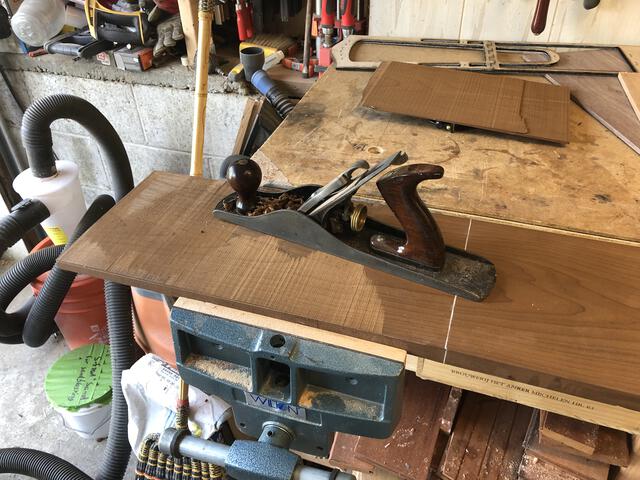
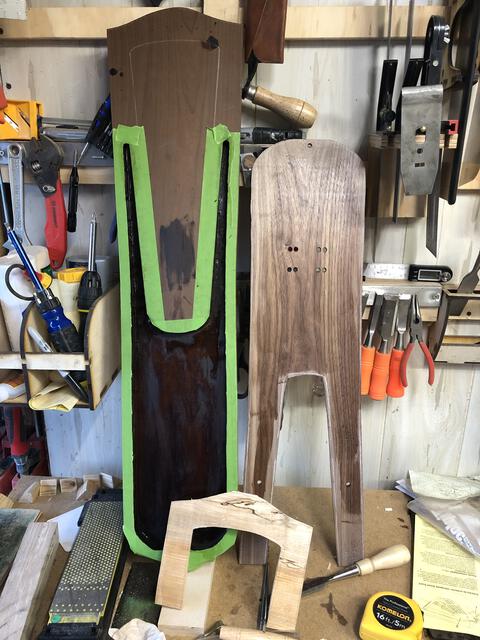
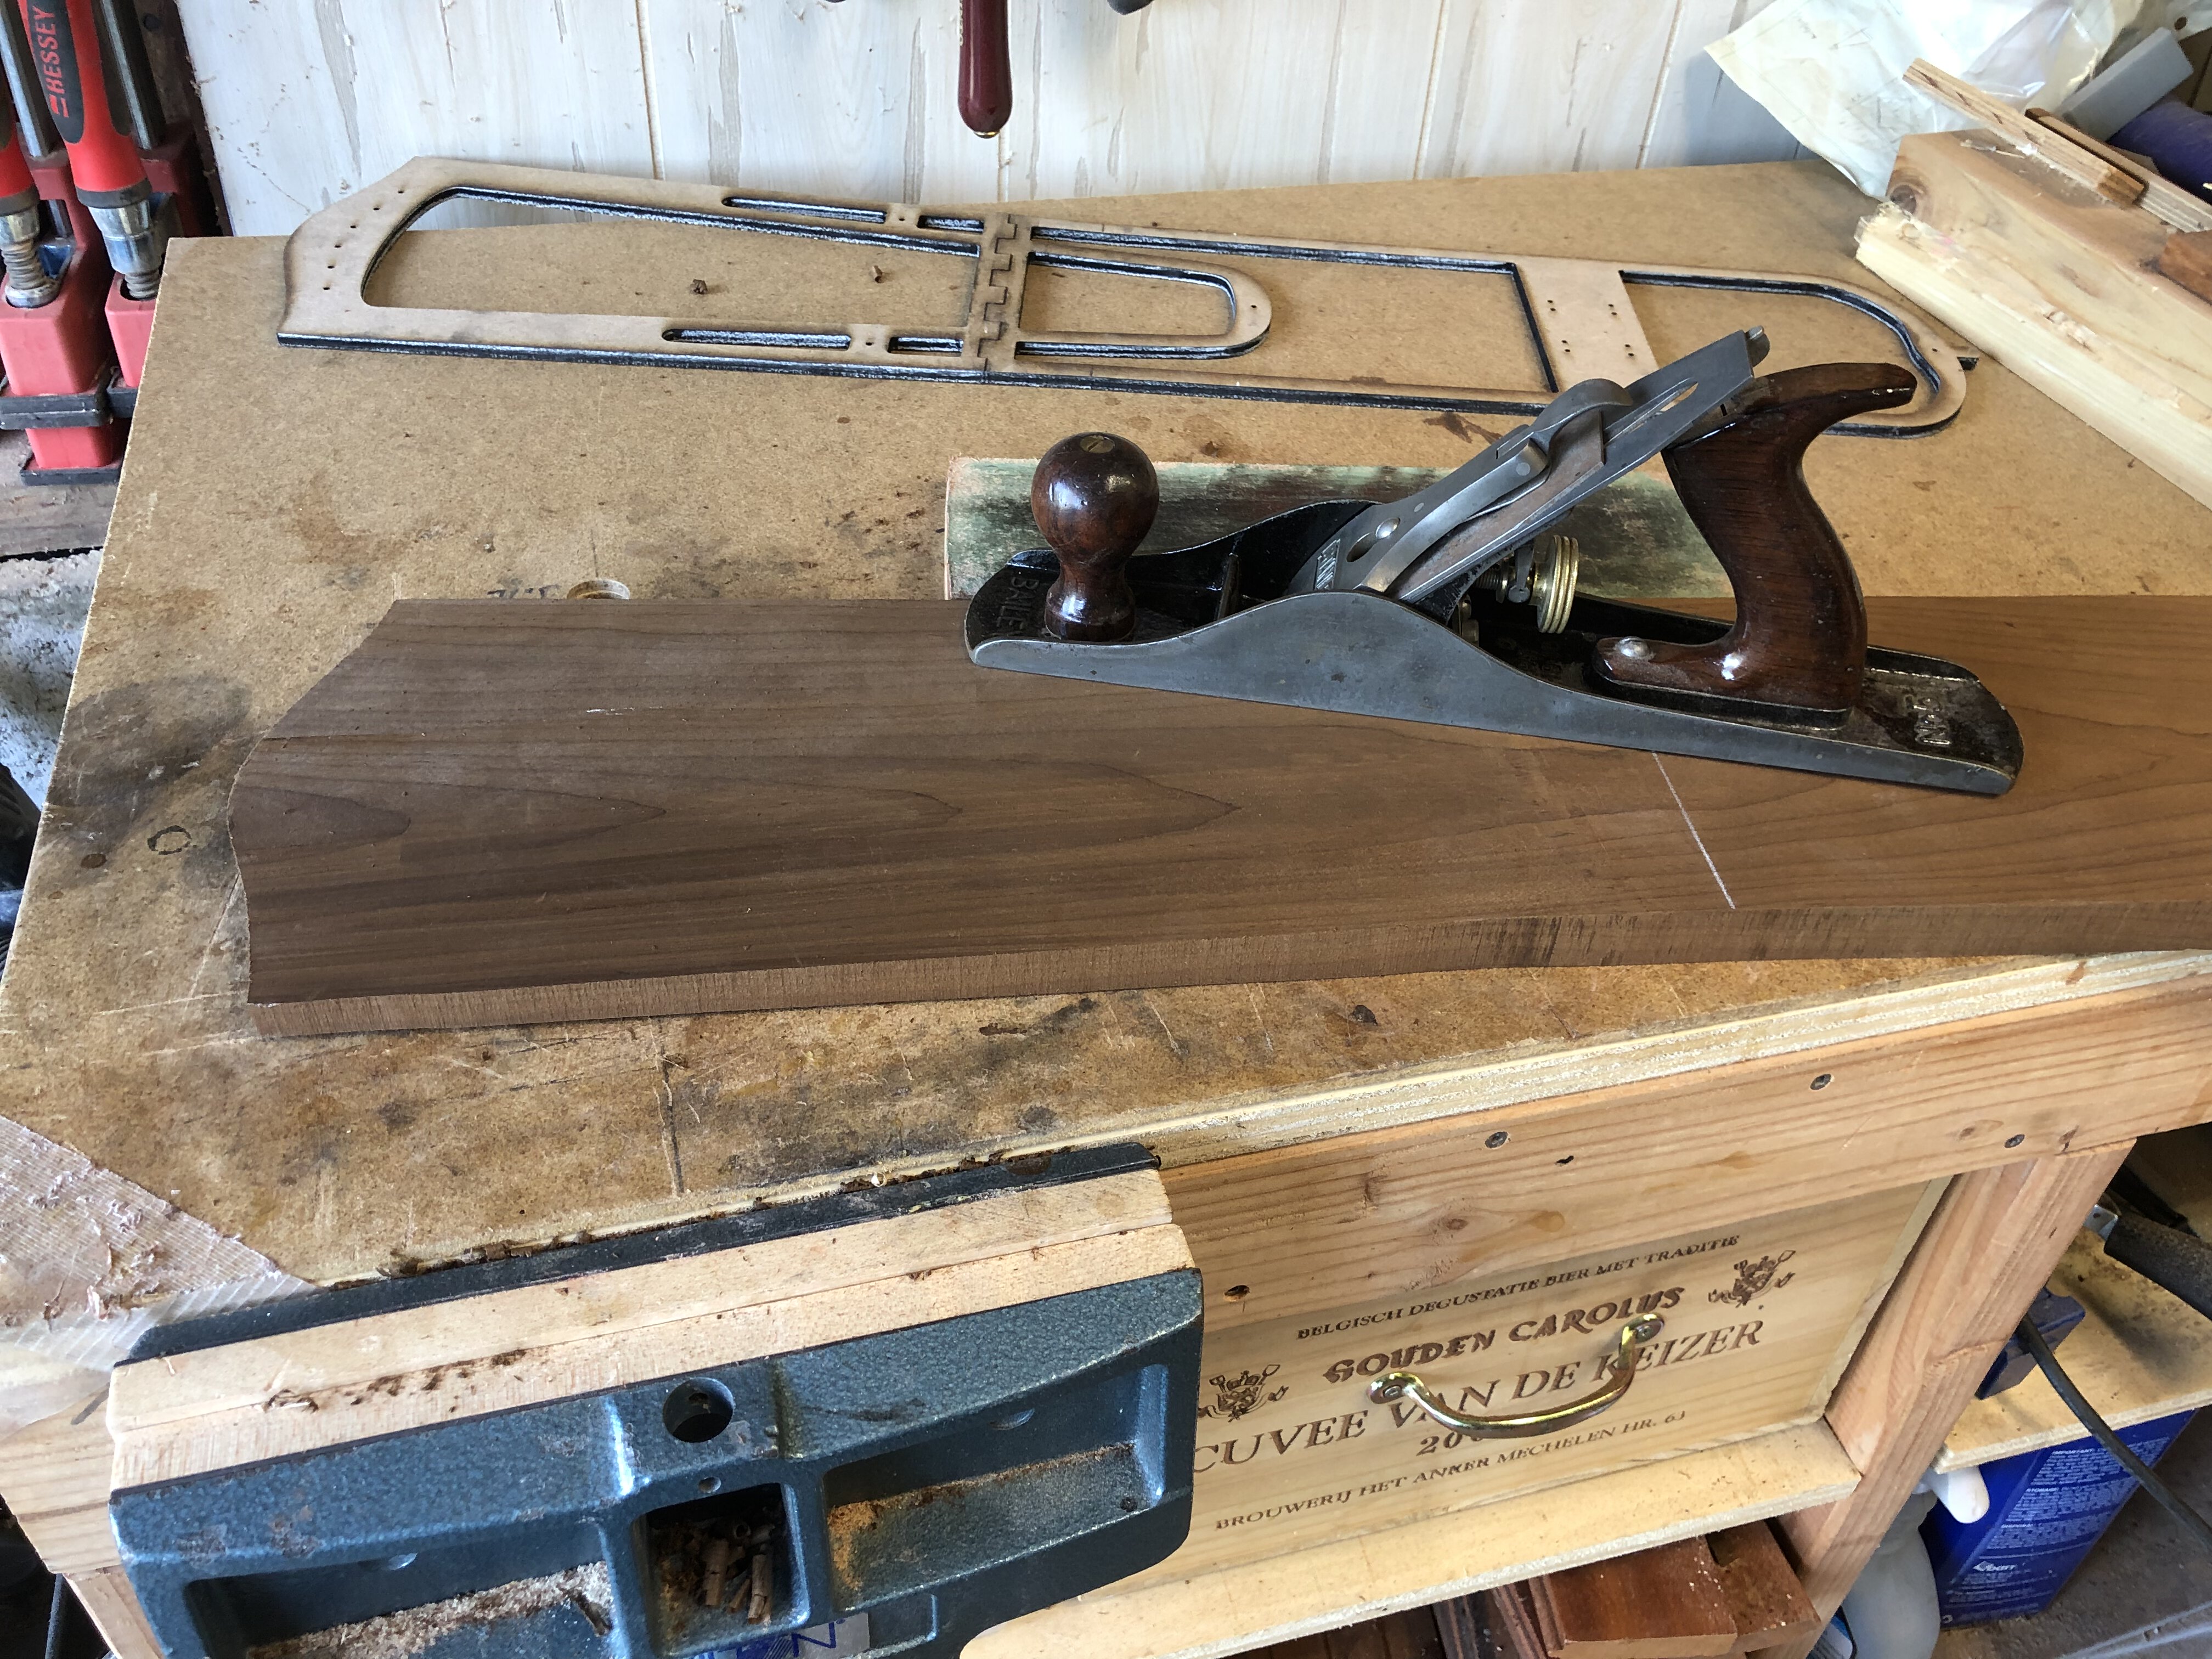
Due to a mixup in my designs, I actually purchased 8/4 wood for the body, so my first task was to resaw this in half and get it smooth on my thickness planer. I also did the same with some thicker pieces of walnut to get them down to 1/8" (3mm) thick. This is somewhat of a happy accident because it left me with enough wood to make two lyres (which is why you will occasionally see duplicate pieces in the photos).
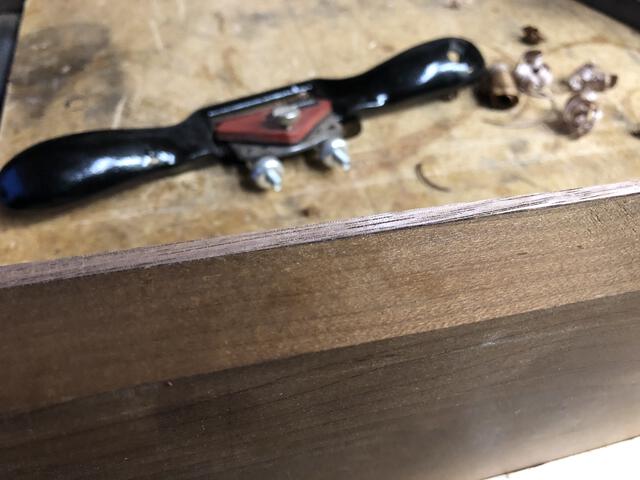
Starting near the top of the soundbox, the Trossingen lyre gets thinner toward the tuning pegs. I used my bandsaw to resaw a narrow diagonal cut roughly to the position it needed to be, and then shaved the rest down to a more precise thickness with a hand plane. I’ve really grown to love working with a very sharp hand plane, and the antique #5 you see in the photos below is one of my absolute favorites – just look at how it can take the rough sawn surface down to something so smooth it doesn’t even need to be sanded.
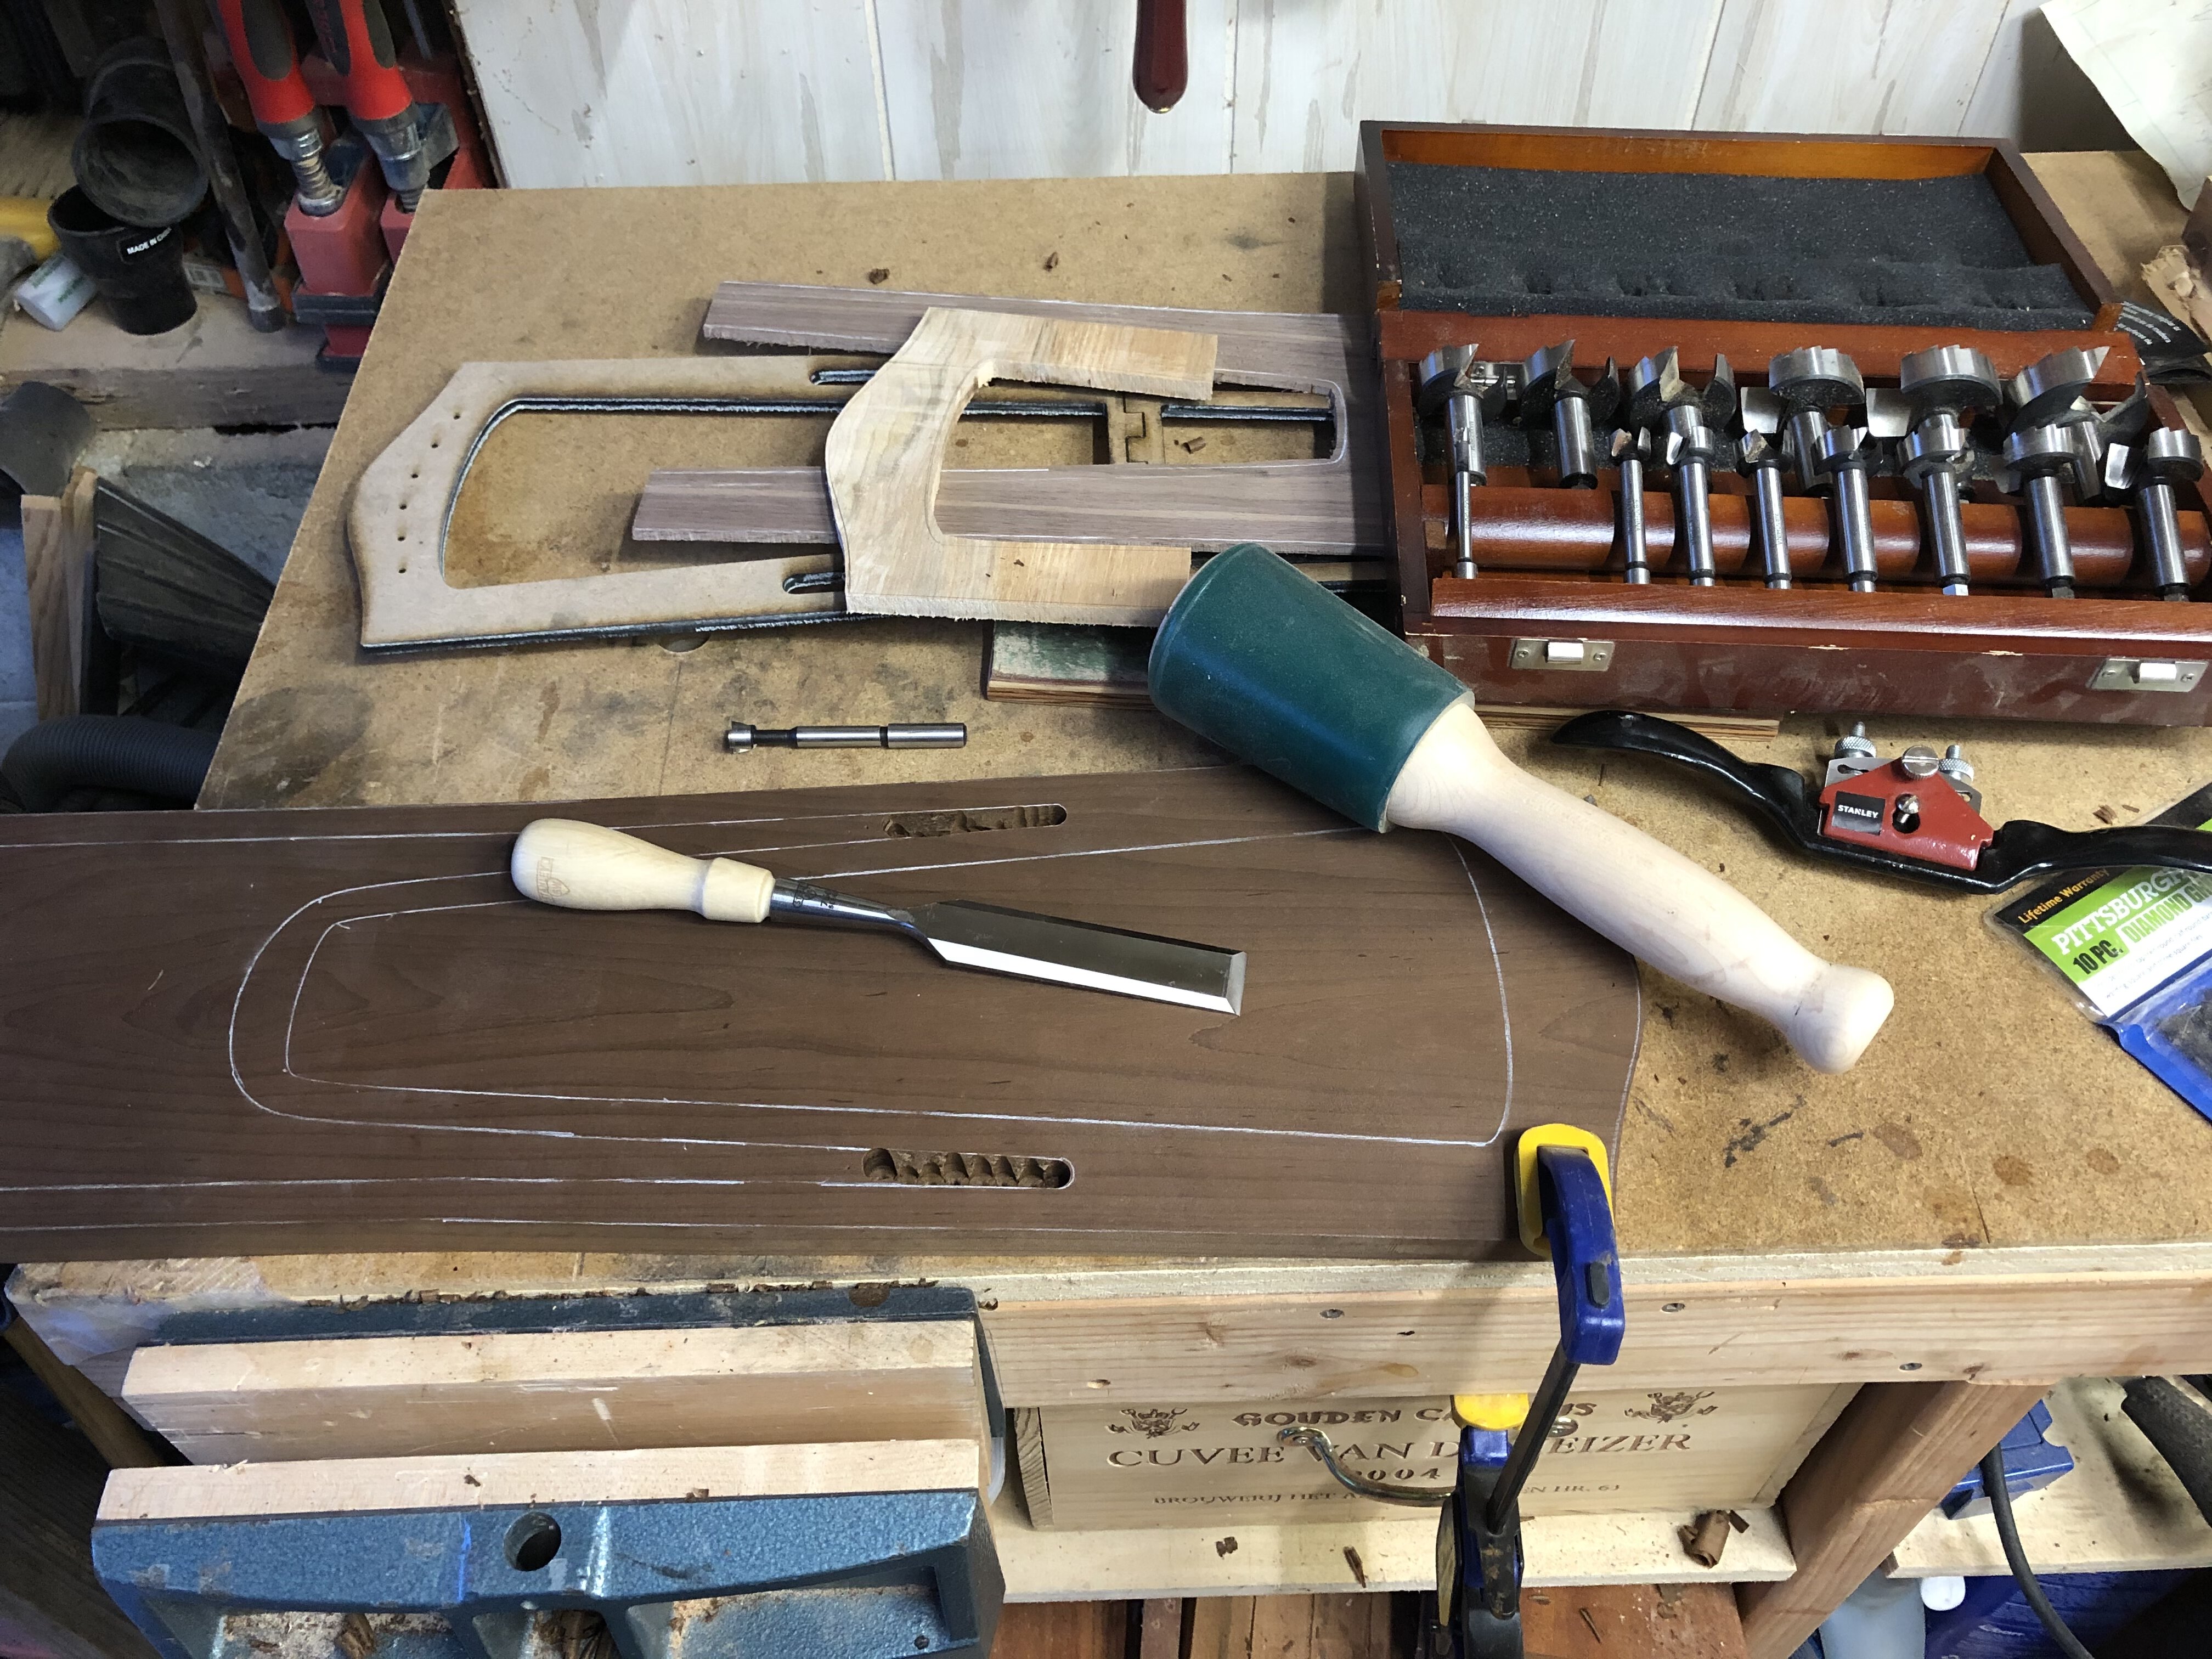
Using the template I created from my CAD drawings (I used my wife’s laser cutter to make this one, but a paper template would work just as well), I traced the shape of the lyre onto my materials and cut everything out roughly on the bandsaw and then did a small amount of smoothing on the main boduy ith the spokeshave just to knock down the most annoying of the saw marks.

The Soundbox
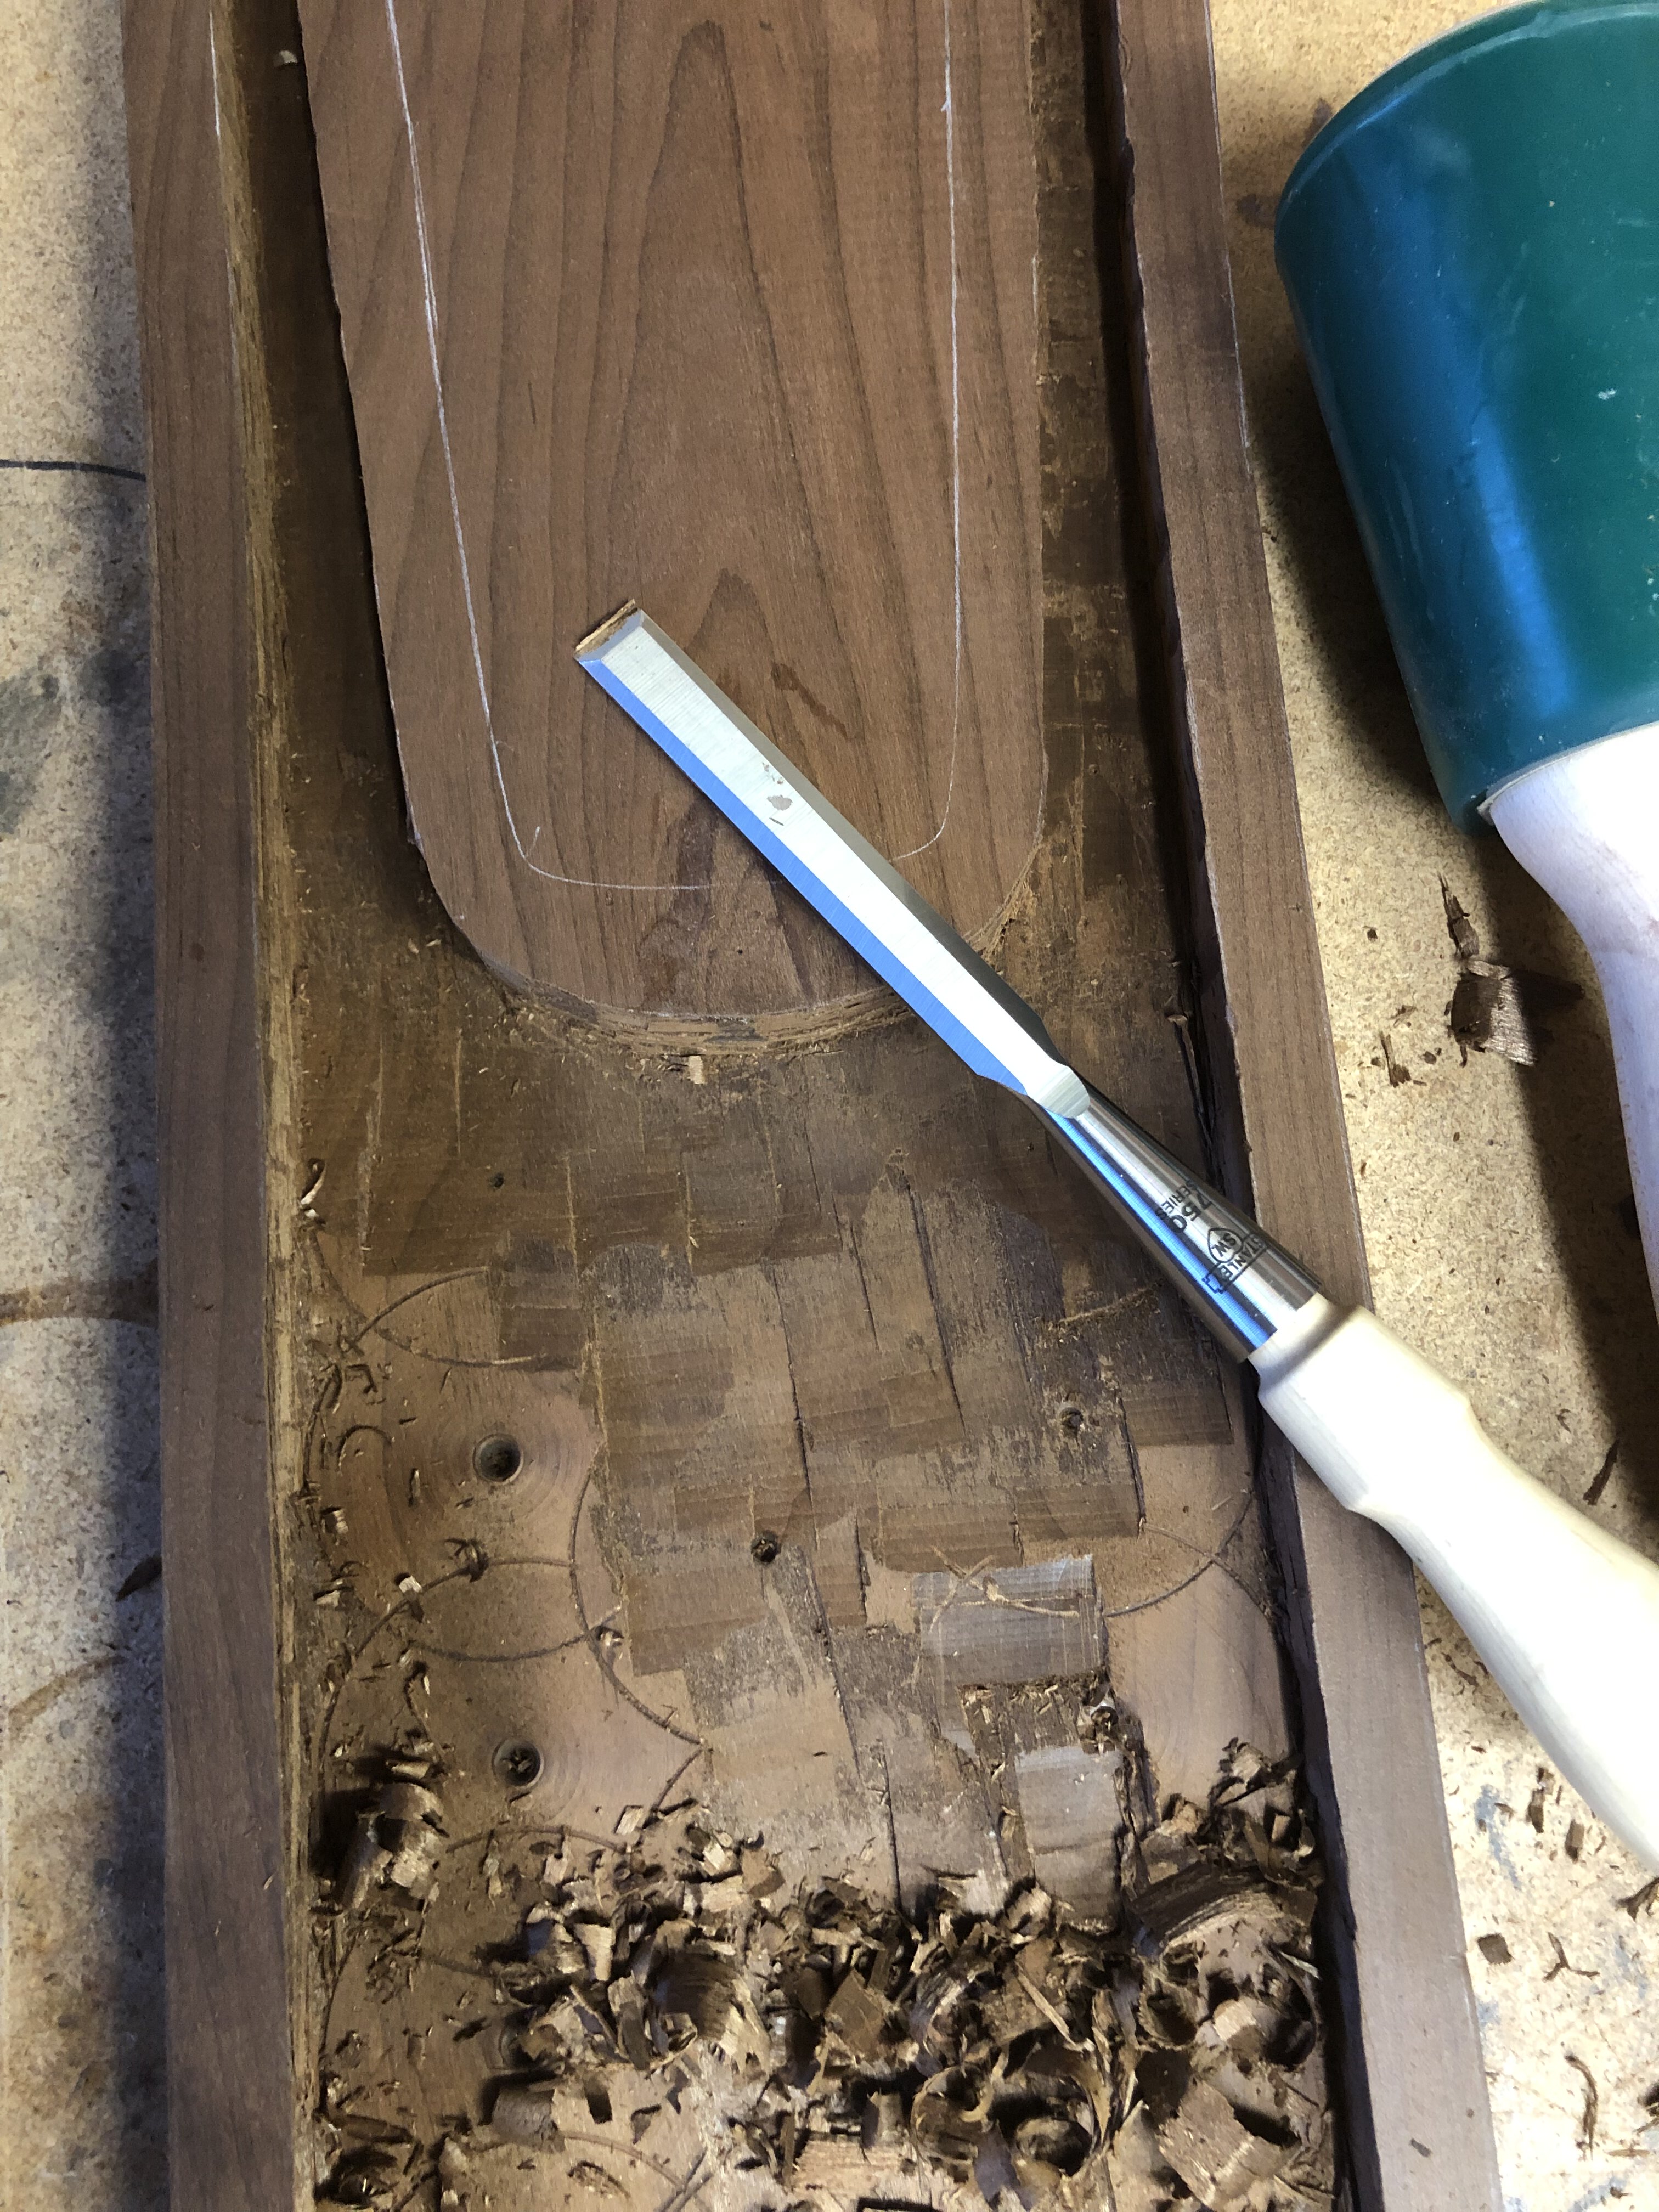
Using my drill press and forstner bits of various sizes, I drilled out as much of the soundbox as I could, down to about 3mm thick below the deepest cut from the drill bits. I haven’t yet modified a set of cheap forstner bits to completely flatten the cutting surface, so my next task was to remove all of the remaining wood by hand with chisels. This takes a long time, and was especially nerve wracking as the wood got continuously thinner, but it really helps to keep the strop near by and re-hone your chisels every couple of minutes so they always have a razor edge. I actually had the most trouble shaping the sides of the walls – the grain of the carbonized maple is somewhat crumbly and I accidentally made a couple of small gouges where the grain wasn’t completely smooth (made especially difficult because I don’t have carving knives or gouges, just straight chisels). Once I got everything down to a consistent thickness, I went over the whole thing several times with card scrapers and sand paper to get the entire soundbox as smooth as possible for the best sound transmission.
Finally, I masked off surfaces that would eventually get glue, and painted both parts of the soundbox with shellac. I really like shellac as a finish, but this is mostly to seal up the grain for even better sound transmission, and provide a small amount of protection from moisture just in case some water were to somehow get inside (I do intend to play this outdoors while camping). The darkness of the maple here is amazing, so I added a quick coat to the top of the walnut just for comparison (even though most of this will get planed away during the final shaping).
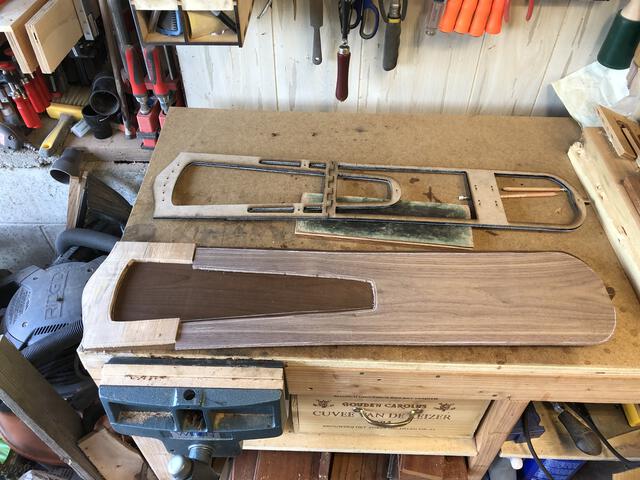
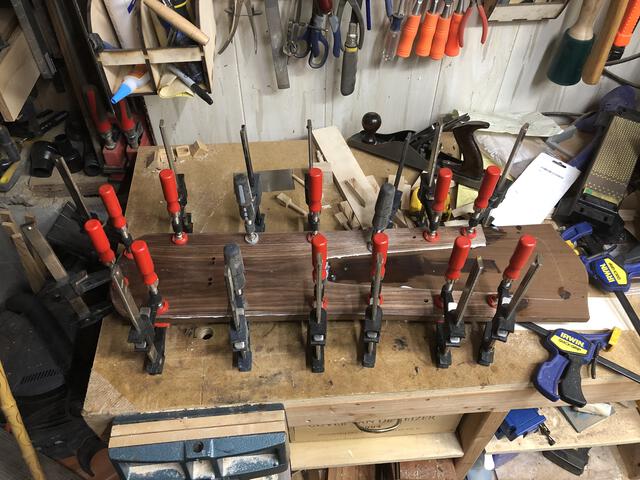
And finally for this phase, I glued everything up. I didn’t quite have enough clamps to glue both of the top pieces at the same time, so this happened in two phases. I think I would probably do things again this way next time because it was a lot easier to line up the spalted maple piece having the already-glued walnut to brace it against.

Now to hollow out the soundbox. Forstner bits are good for hogging out a lot of material, but there will be even more work with a chisel to get it all smooth for the sound waves to bounce around on.
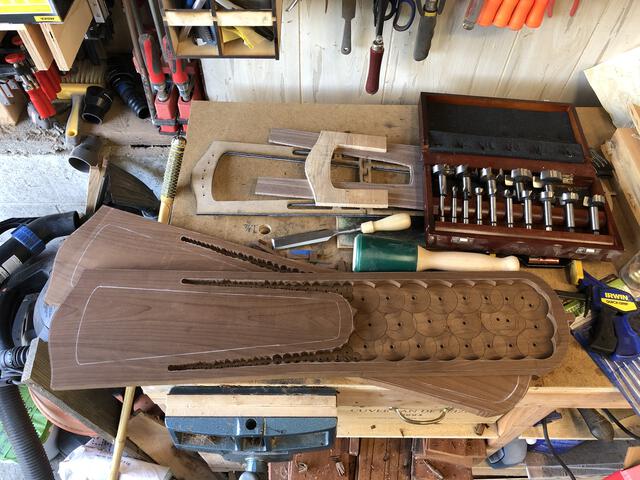

Chisel out all of the drilled holes. I've learned how important it is to have sharp chisels. These are sharper than the average razor blade.
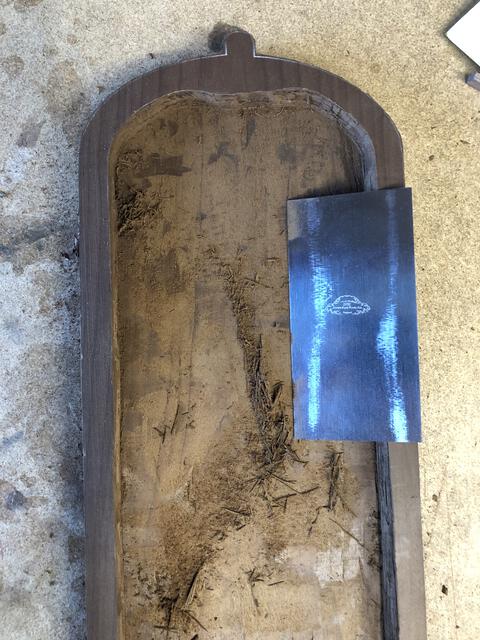
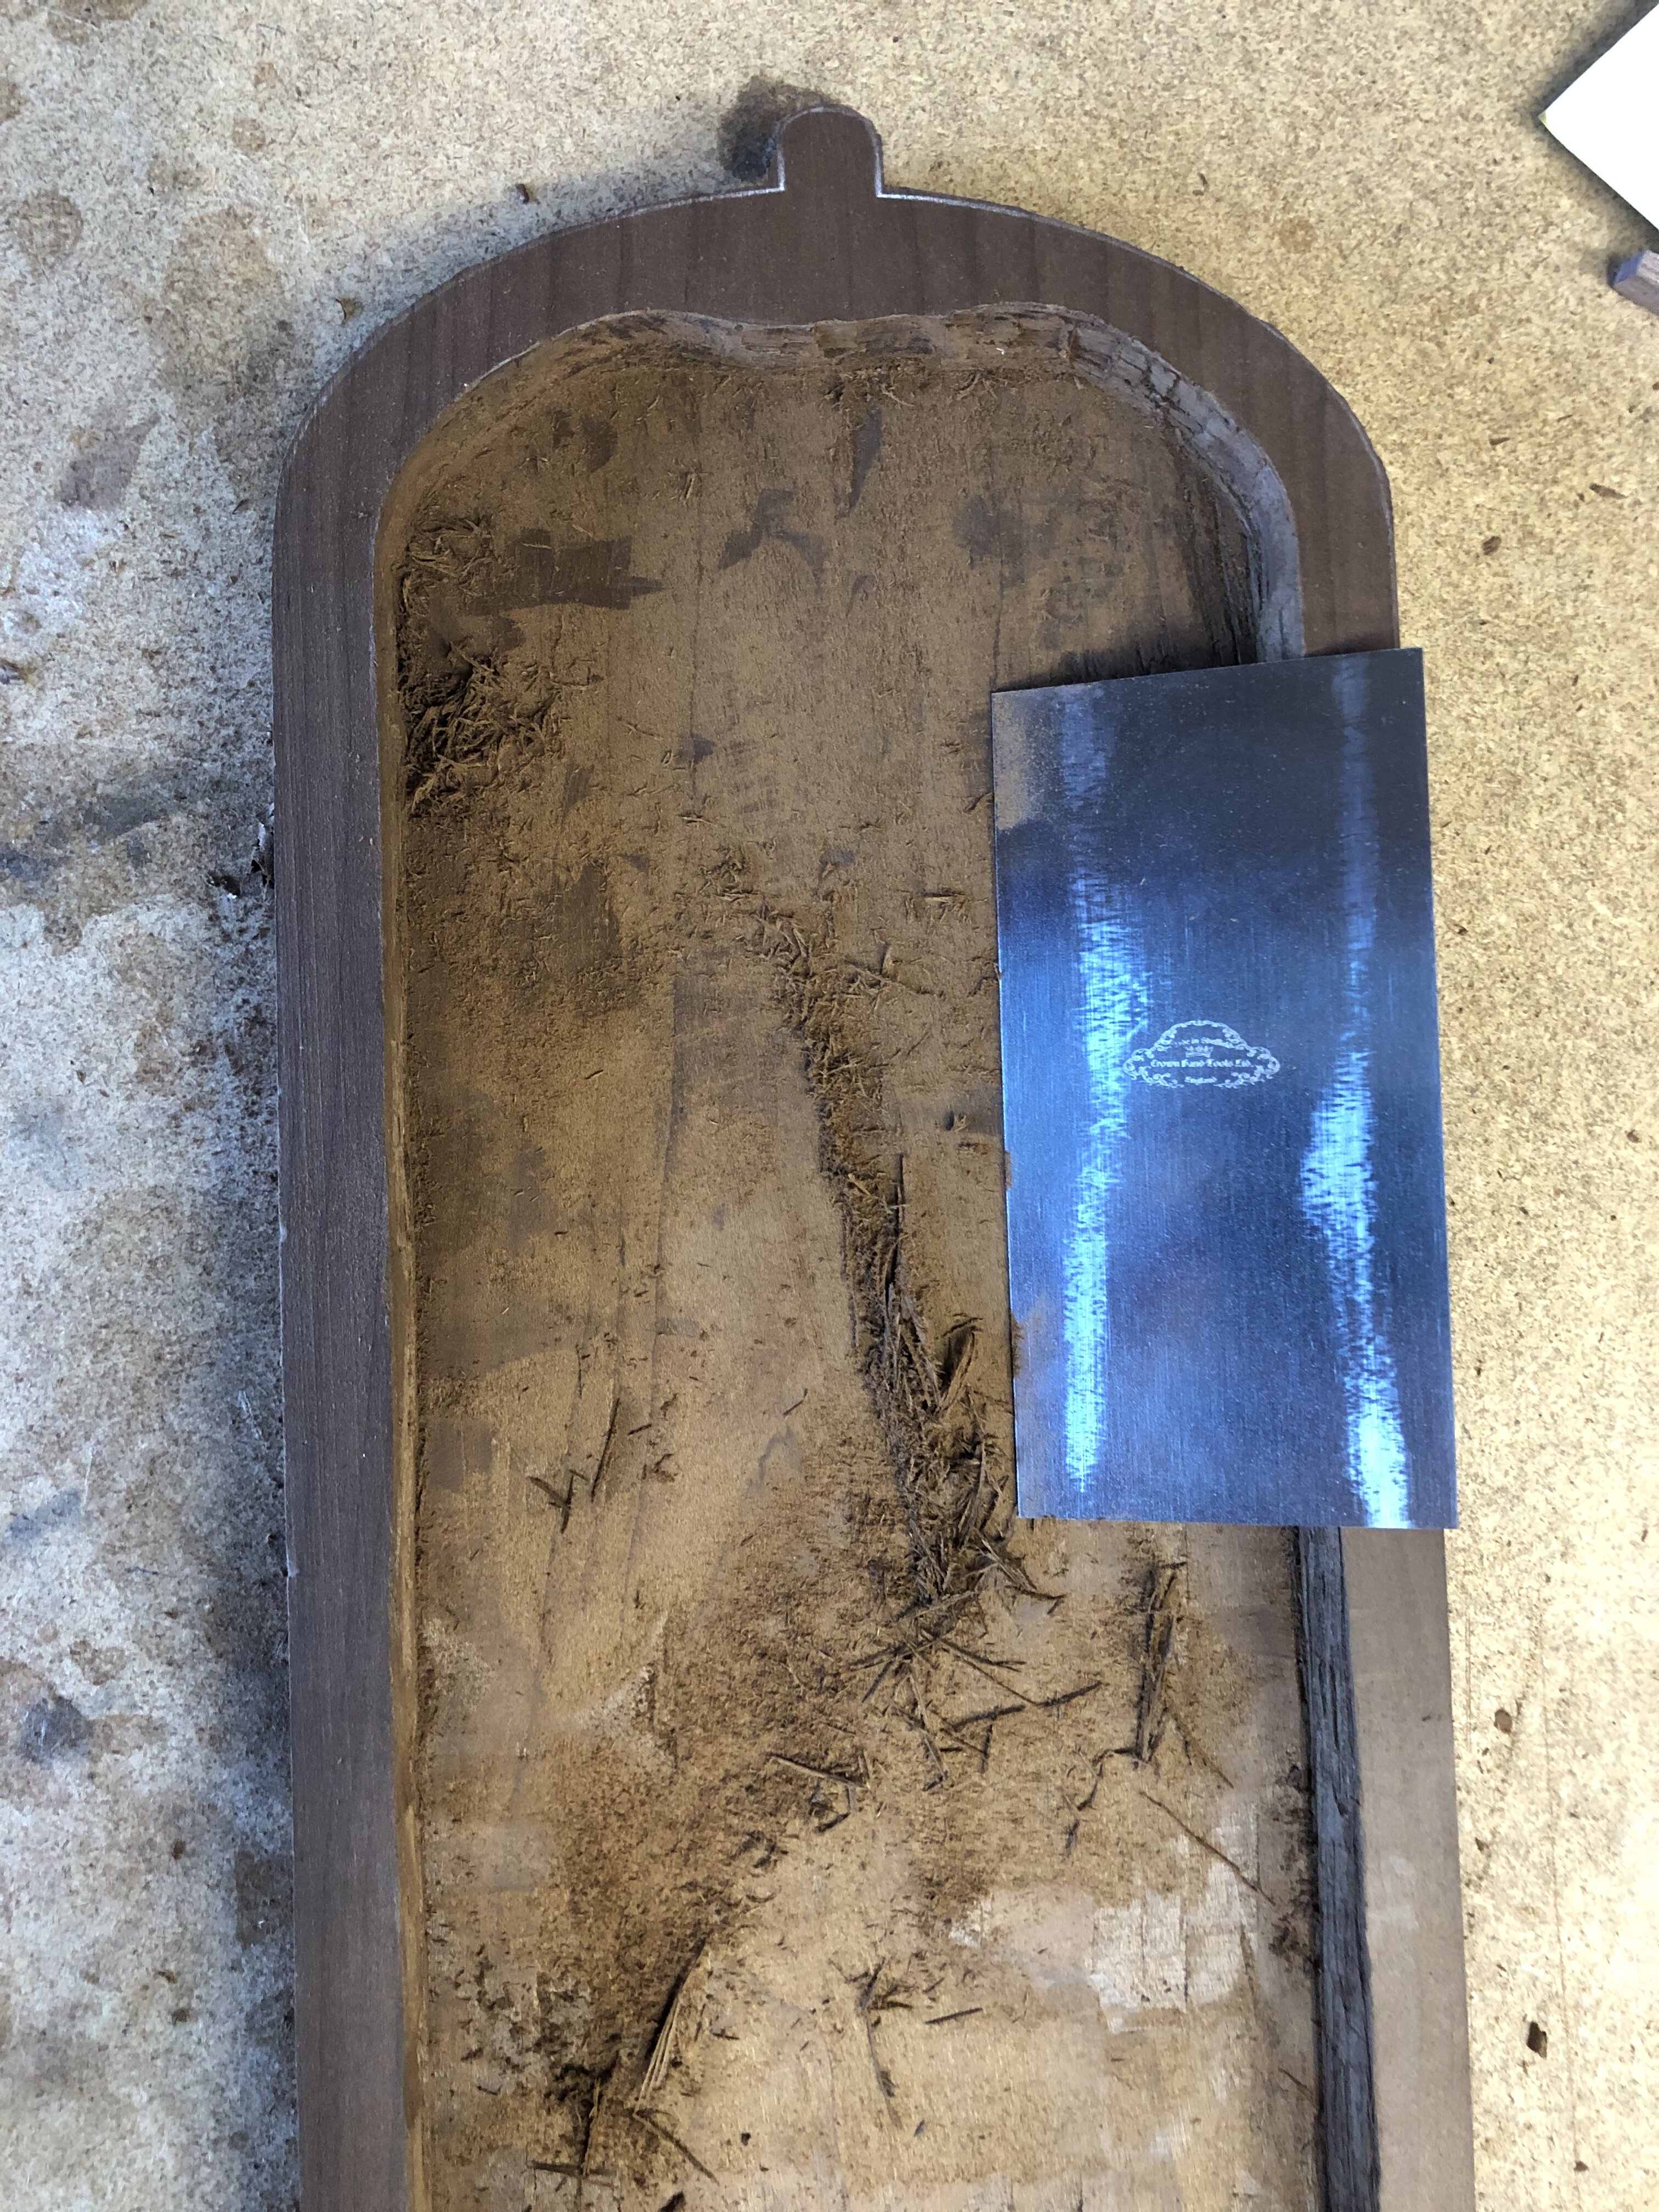
If I owned a router plane, I'd use that to flatten the bottom of the soundbox, but a card scraper seems to do an ok job. It's just a lot more work. I'll alternate between sandpaper and scraper until the bottom and edges are as smooth as possible.
Final Shaping
The first step to the final shaping was to cut out the interior hole where the player’s hand will go. I’m terrible with a coping saw, and this might be the thing that gets me to upgrade to a true fretsaw. Rather than accidentally cut too close to my line, I gave up on accuracy and just left myself a bunch of extra wood to remove with a spokeshave (when would fit) and spindle sander. I can definitely see how lyres made with the crossbar as a separate piece would be a lot easier to deal with, since it would allow a regular saw to get most of the way down both sides of the arms and produce a much straighter cut.
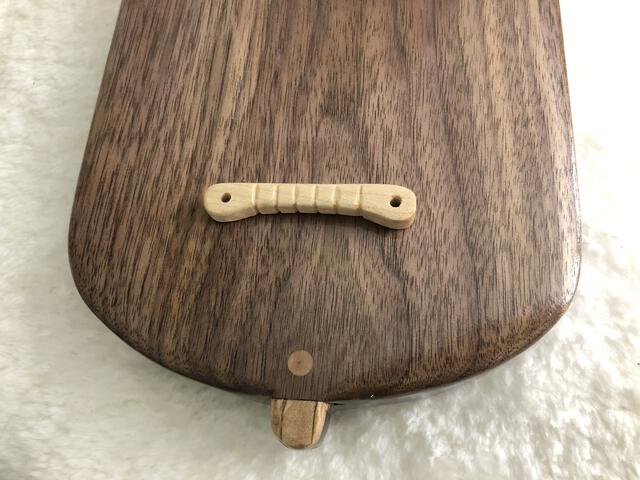
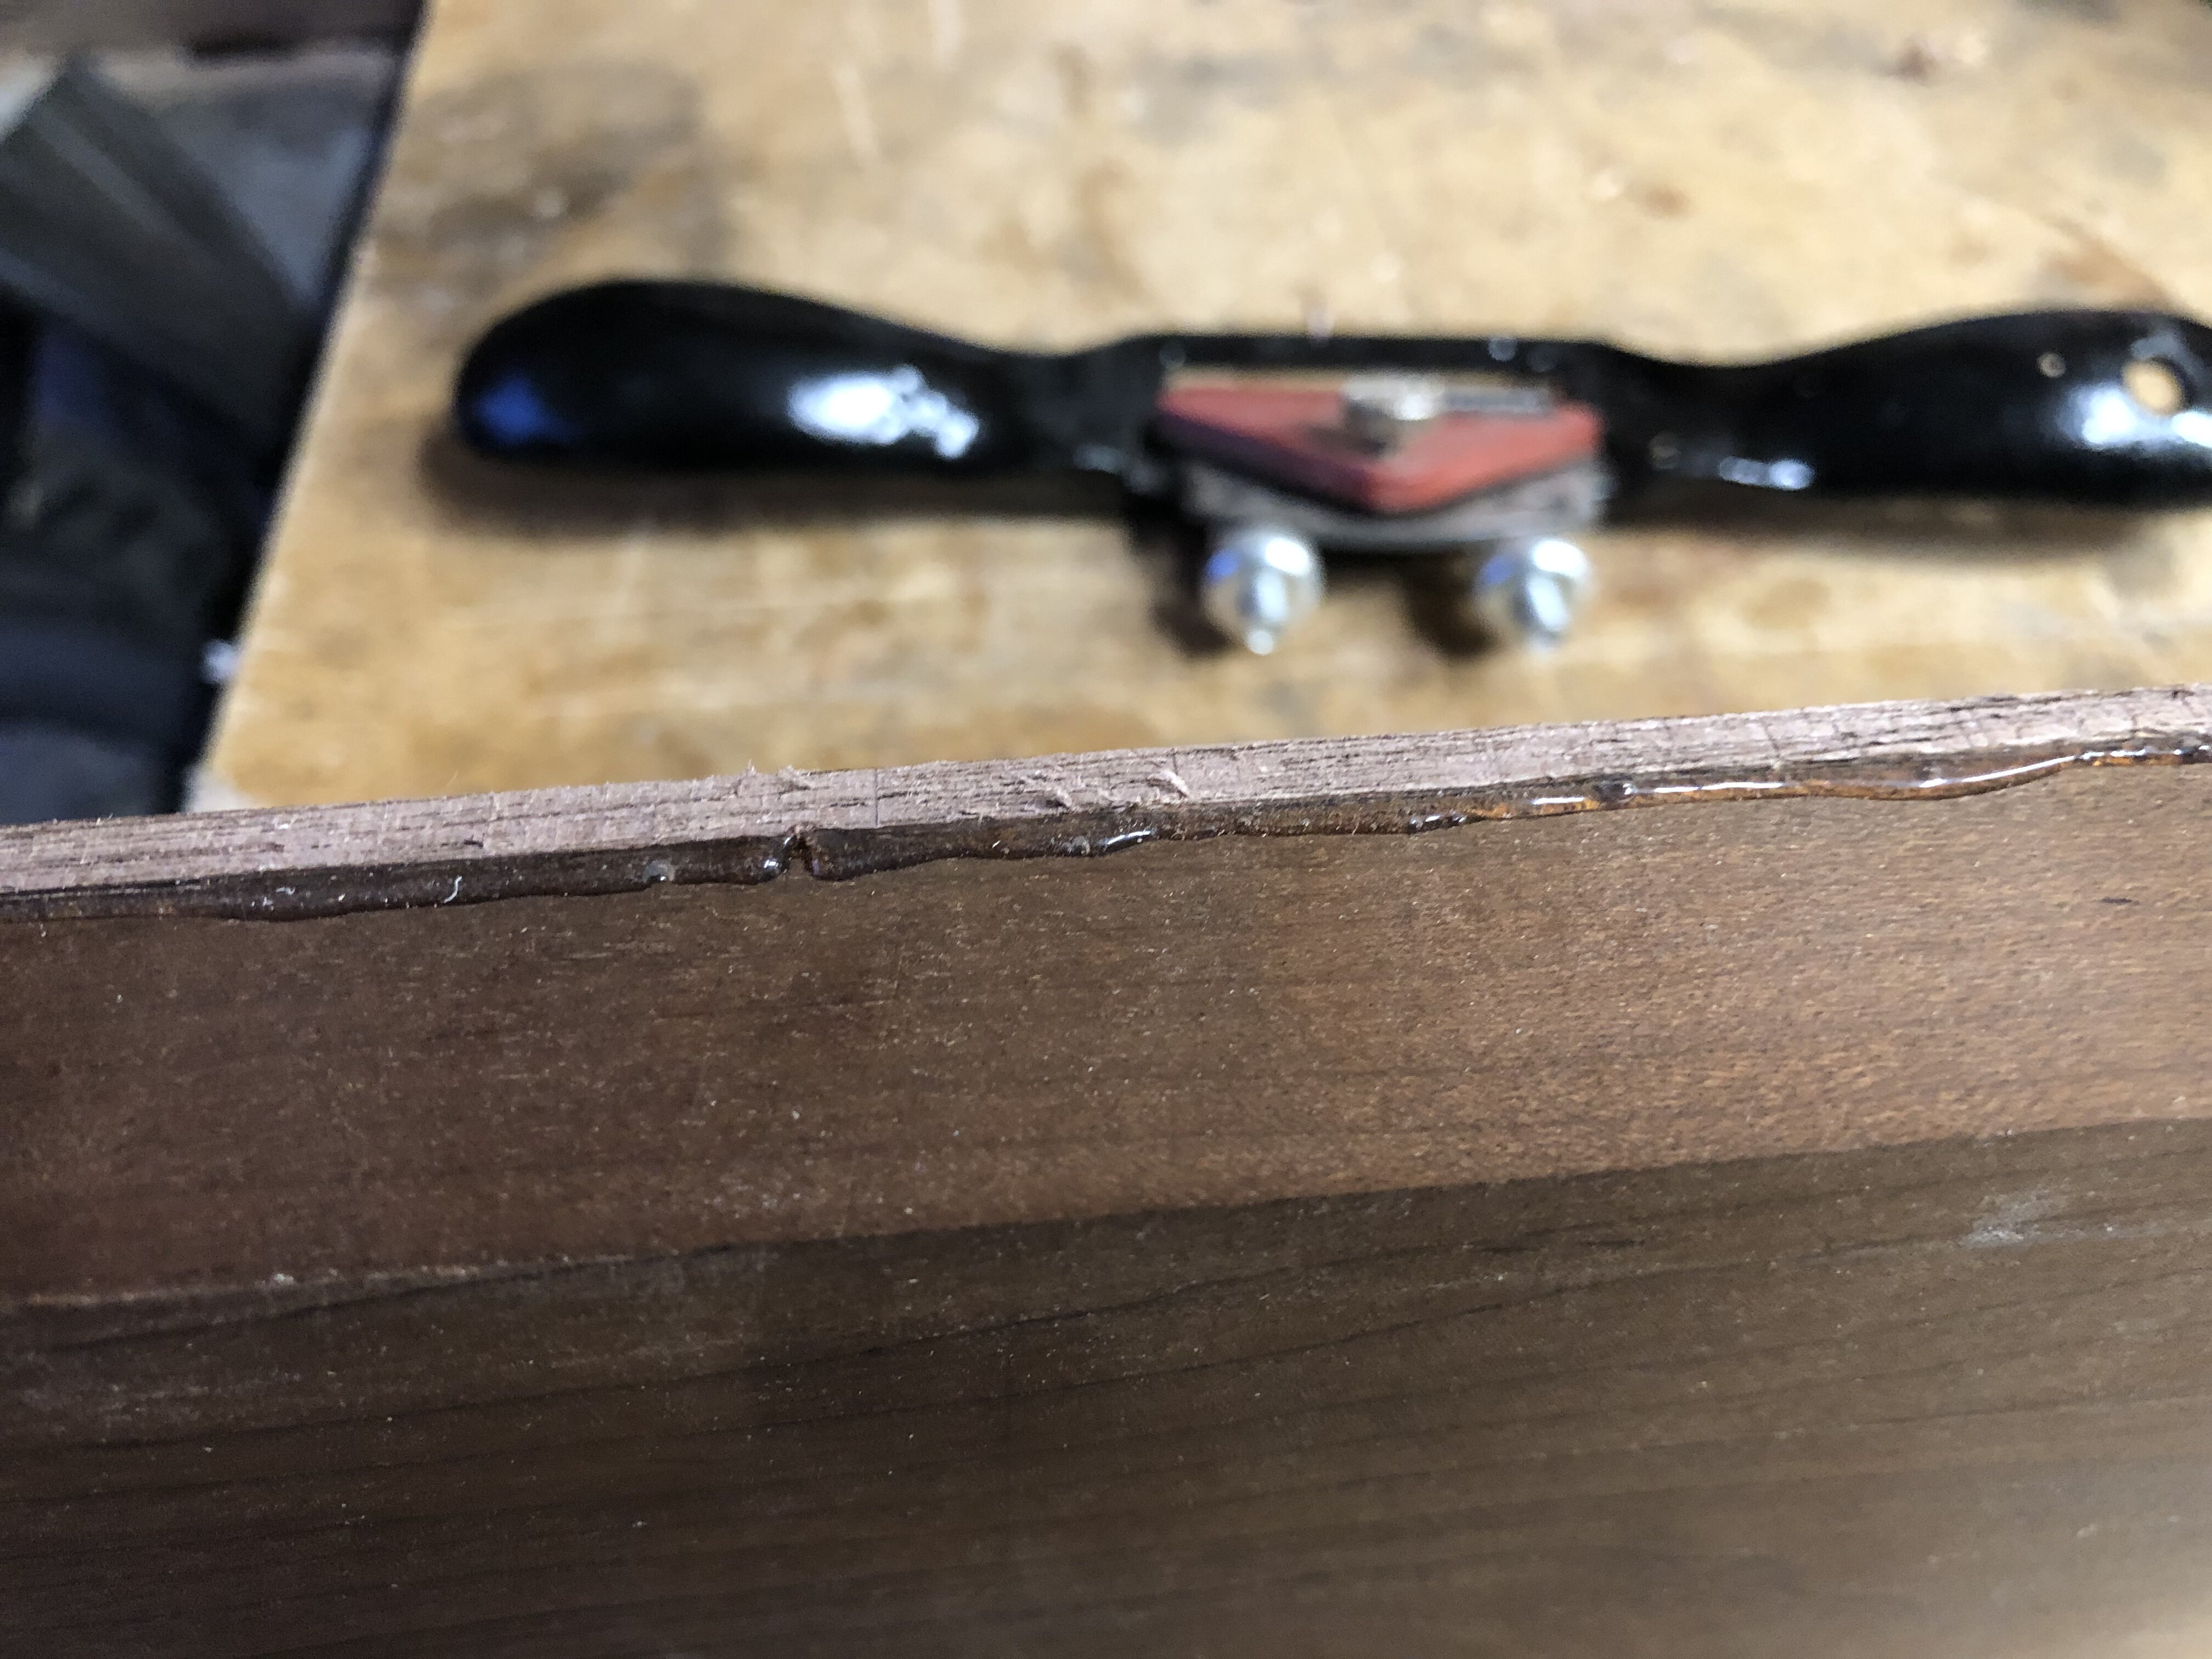
This is also the step where I made my biggest mistake. The Trossingen lyre has two dowel pins at the top and bottom of the soundbox, and I decided to use tapered maple pins (cast-offs from my tuning peg experiments) instead of dowels, which would have been from a different kind of wood. While pounding in one of the pins, I hit it ever so slightly too hard and managed to leave a hairline split in the back of the soundbox. Thankfully, it was easily fixed with a bit of glue and sawdust (and the glue holding in the pin itself should prevent further splitting), but it was a loud reminder how fragile some of this wood can be. It’s also worth noting that the bottom pin on the actual lyre actually protrudes and sits proud of the soundboard by about 1cm – I chose to cut both of my pins flush to the soundboard because I’m not actually sure how the protruding lower pin would be used.
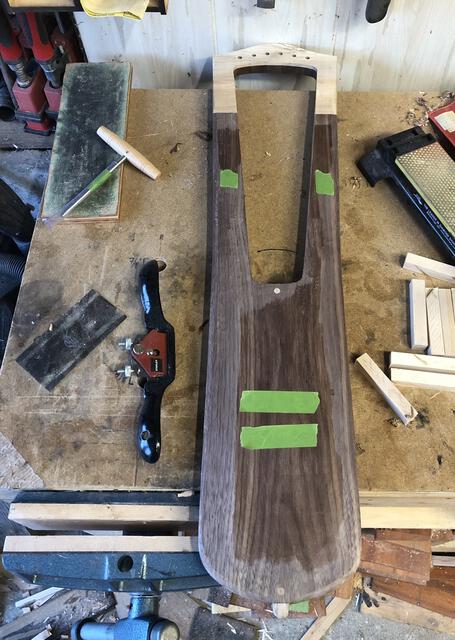
After sanding everything close to my marks, I moved on to hand shaping everything, which was probably the trickiest step after hollowing out the soundbox. Some of this was due to my lack of experience shaping things with rasps and files, as well as a bit of fighting with the grain in walnut soundboard, but mostly it was just that I couldn’t get my tools where I wanted them to be. My spokeshave is too big to get into the corners of the interior hole (makes me really curious about the Millers Falls “cigar” spokeshave), and my workbench just isn’t set up right to hold the entire lyre in place to run a plane or spokeshave down the entire length of the instrument in order to start/finish a shave cleanly. In the end, I just took my time with this and switched between all of my tools as it felt appropriate. There was more than a little joy watching and feeling the shape of the instrument come together throughout this process and it was difficult to get myself to admit that it really was done enough to continue on to the next step.

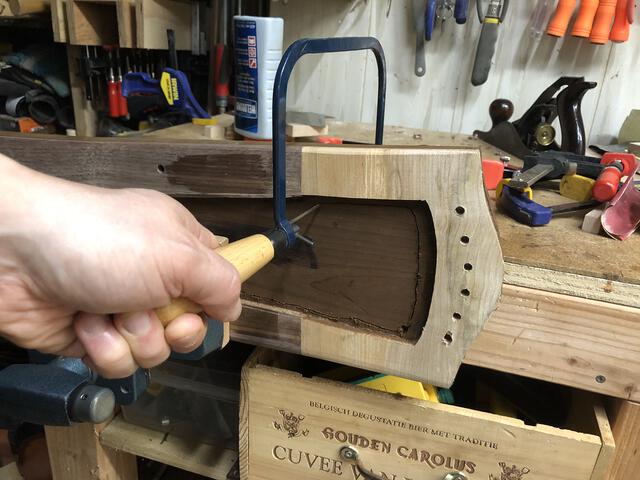
Honestly, my least favorite tool to use. It causes hand cramps, *and* I'm terrible at it. Maybe some day I'll take the time to learn (or get a real fret saw instead of this mediocre coping saw). Until then, I'm thankful for my sander to help clean up all of those jagged edges.
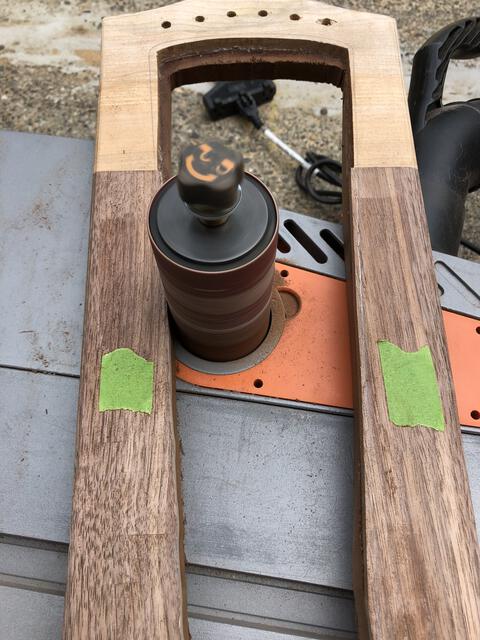
Cleaning up everything I couldn't get with the coping saw. After this, I need to start thinking seriously about how to make the tuning pegs.

Finish
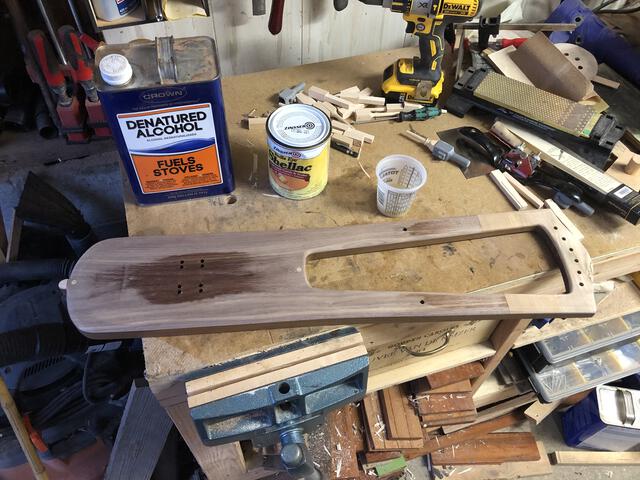
Finishing the main lyre body is pretty straightforward. I pondered using boiled linseed oil, but didn’t have any on hand and happen to really like the look of clear shellac.
I thinned the canned shellac 1:1 with denatured alcohol and wiped on two thin coats to get as much wood penetration as I could. After letting that dry for about 5 minutes, I wiped on a full-strength coat and let it dry.
I let this dry overnight and then went over the whole thing again with 400 grit sandpaper (I was planning to use steel wool, but I couldn’t find any), wiped the dust off with a dry cloth, and then added 2 more coats of shellac, this time from a spray can. The final result is a perfectly smooth finish that really shows off the character of the wood.

Tuning Pegs
I’ve been working through how to make these, and have learned a lot (meaning, I’ve made a bunch of mistakes). I’d like to document all of this (including my failures and unorthodox tools), so this will get its own writeup.
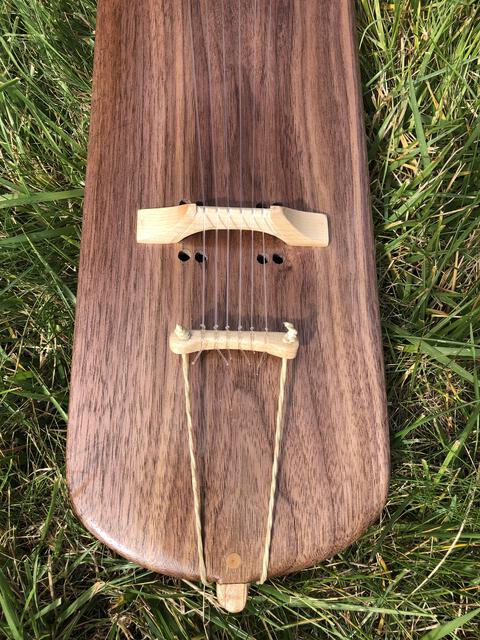
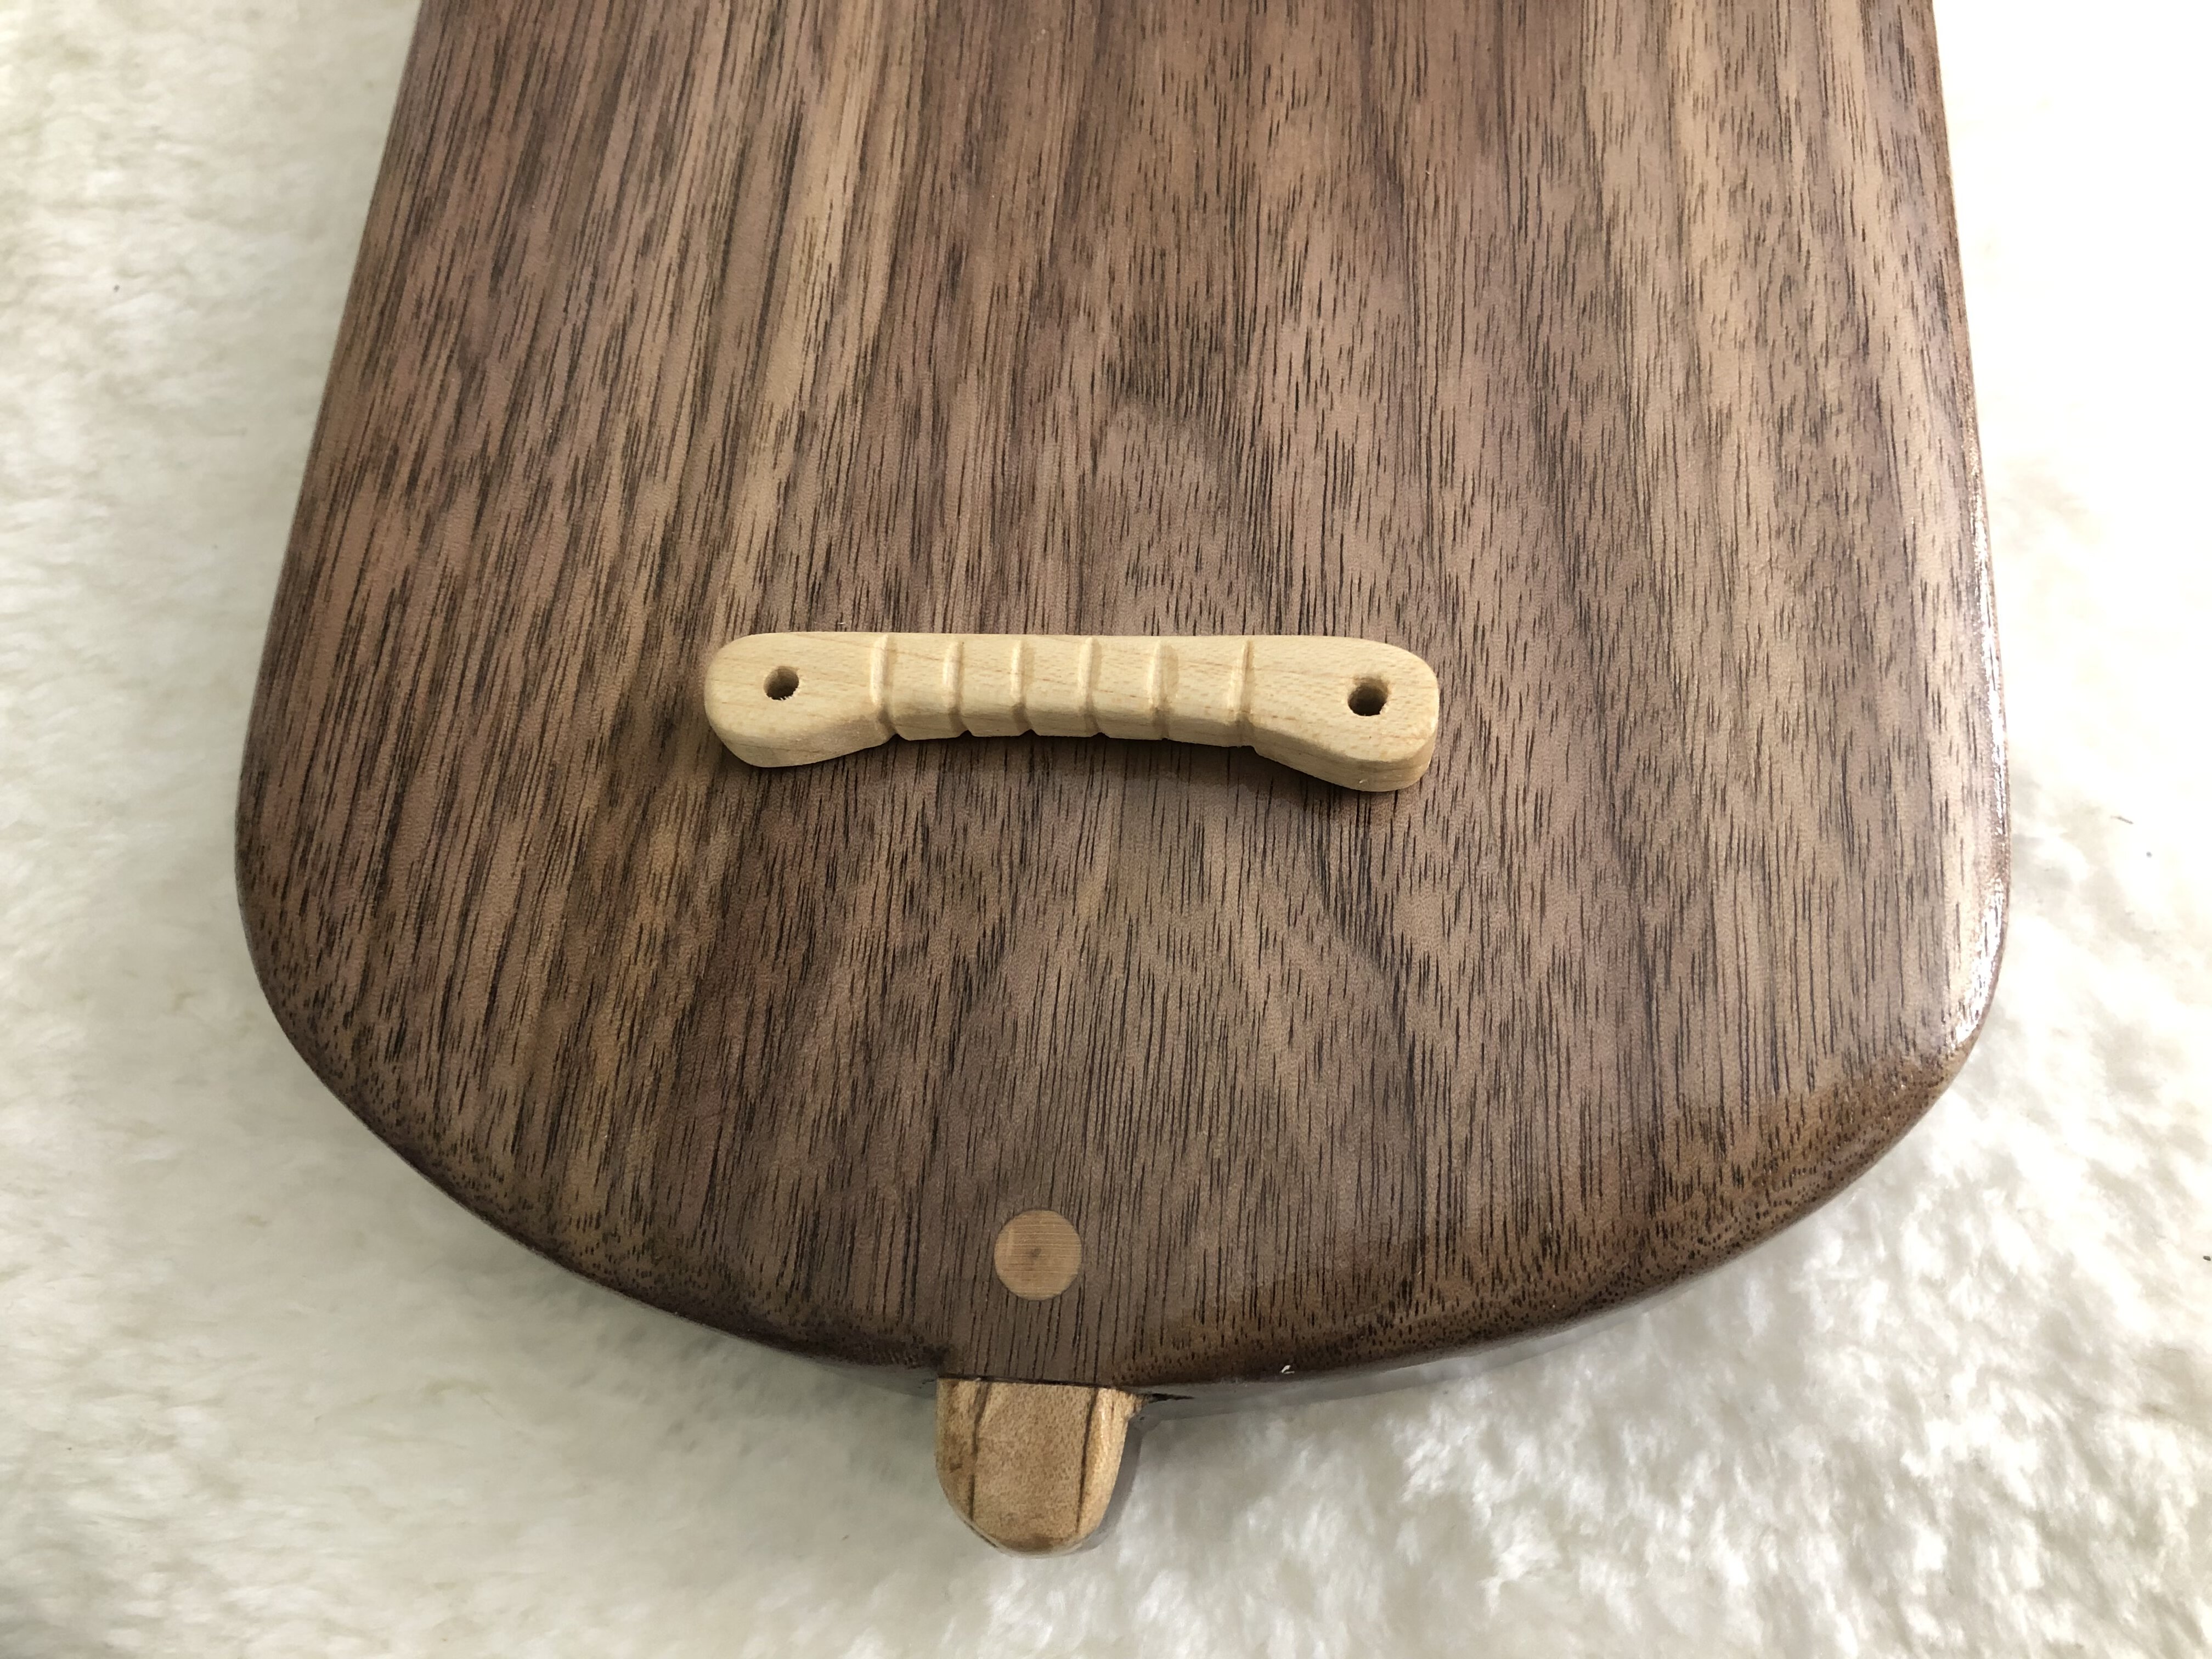
Bridge
The bridge is one of the most important pieces of the instrument for carrying sound. If it is not made well, or does not seat properly, the lyre will not sound nearly as good as it should.
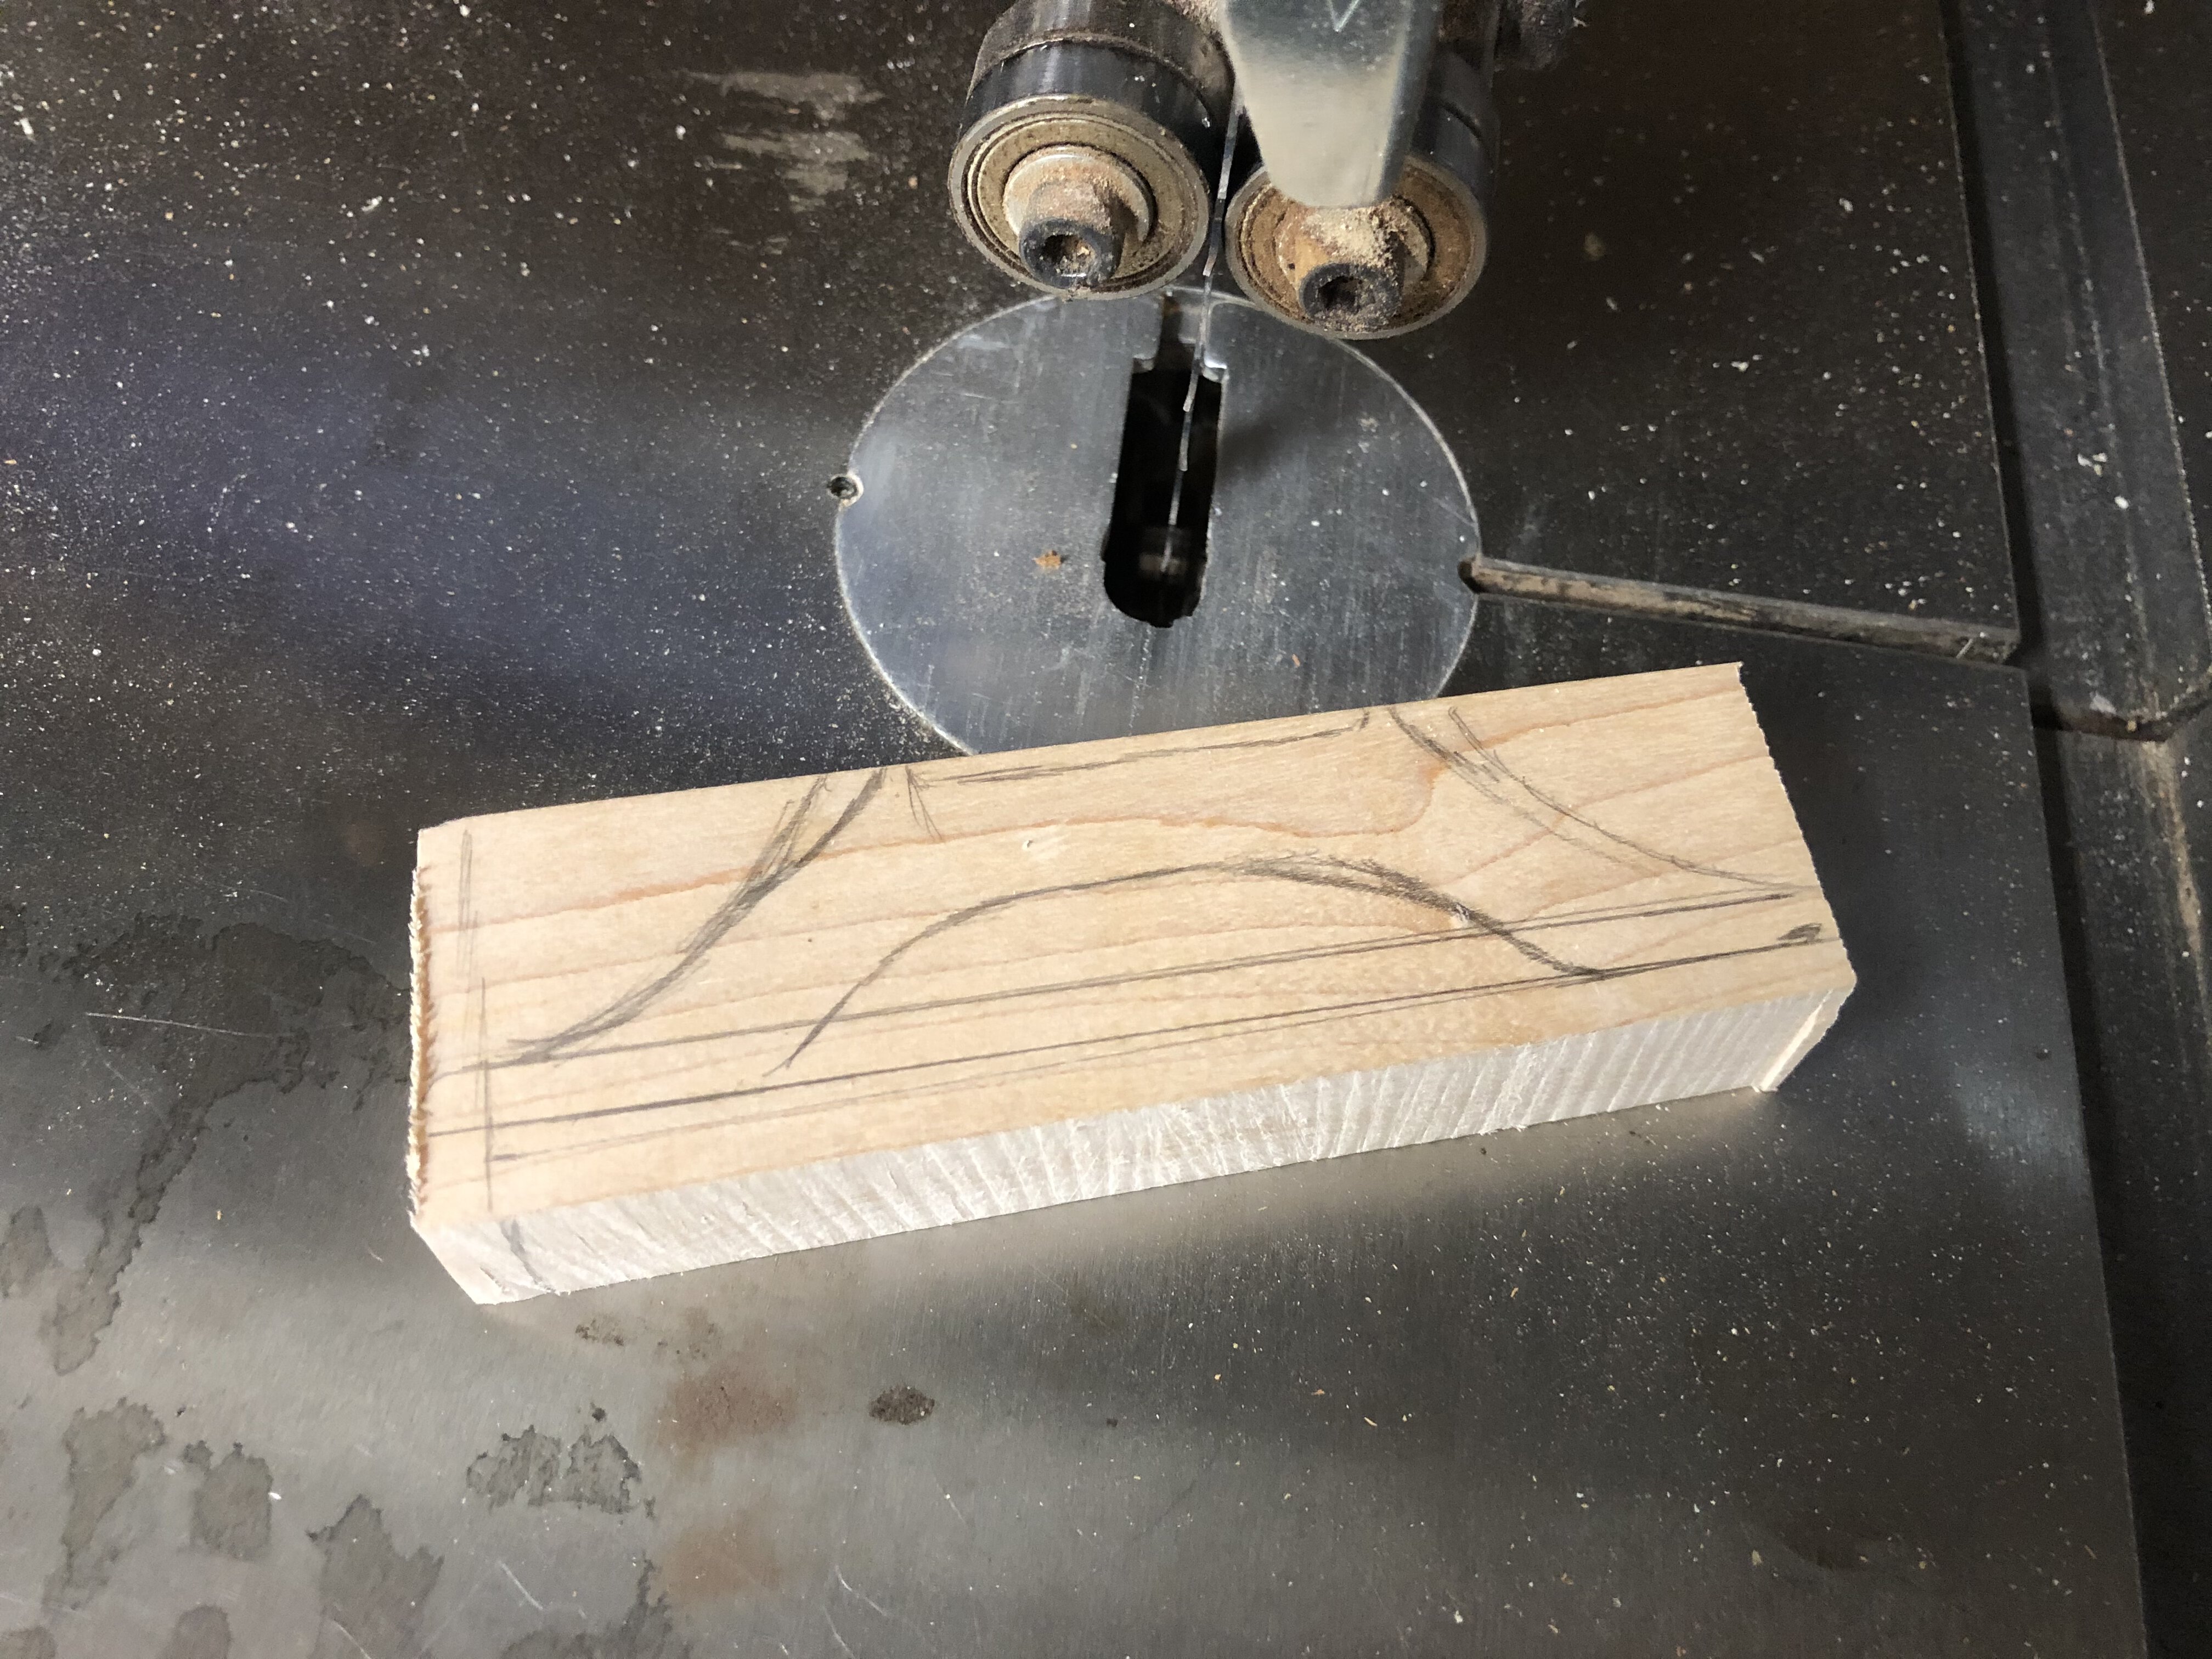
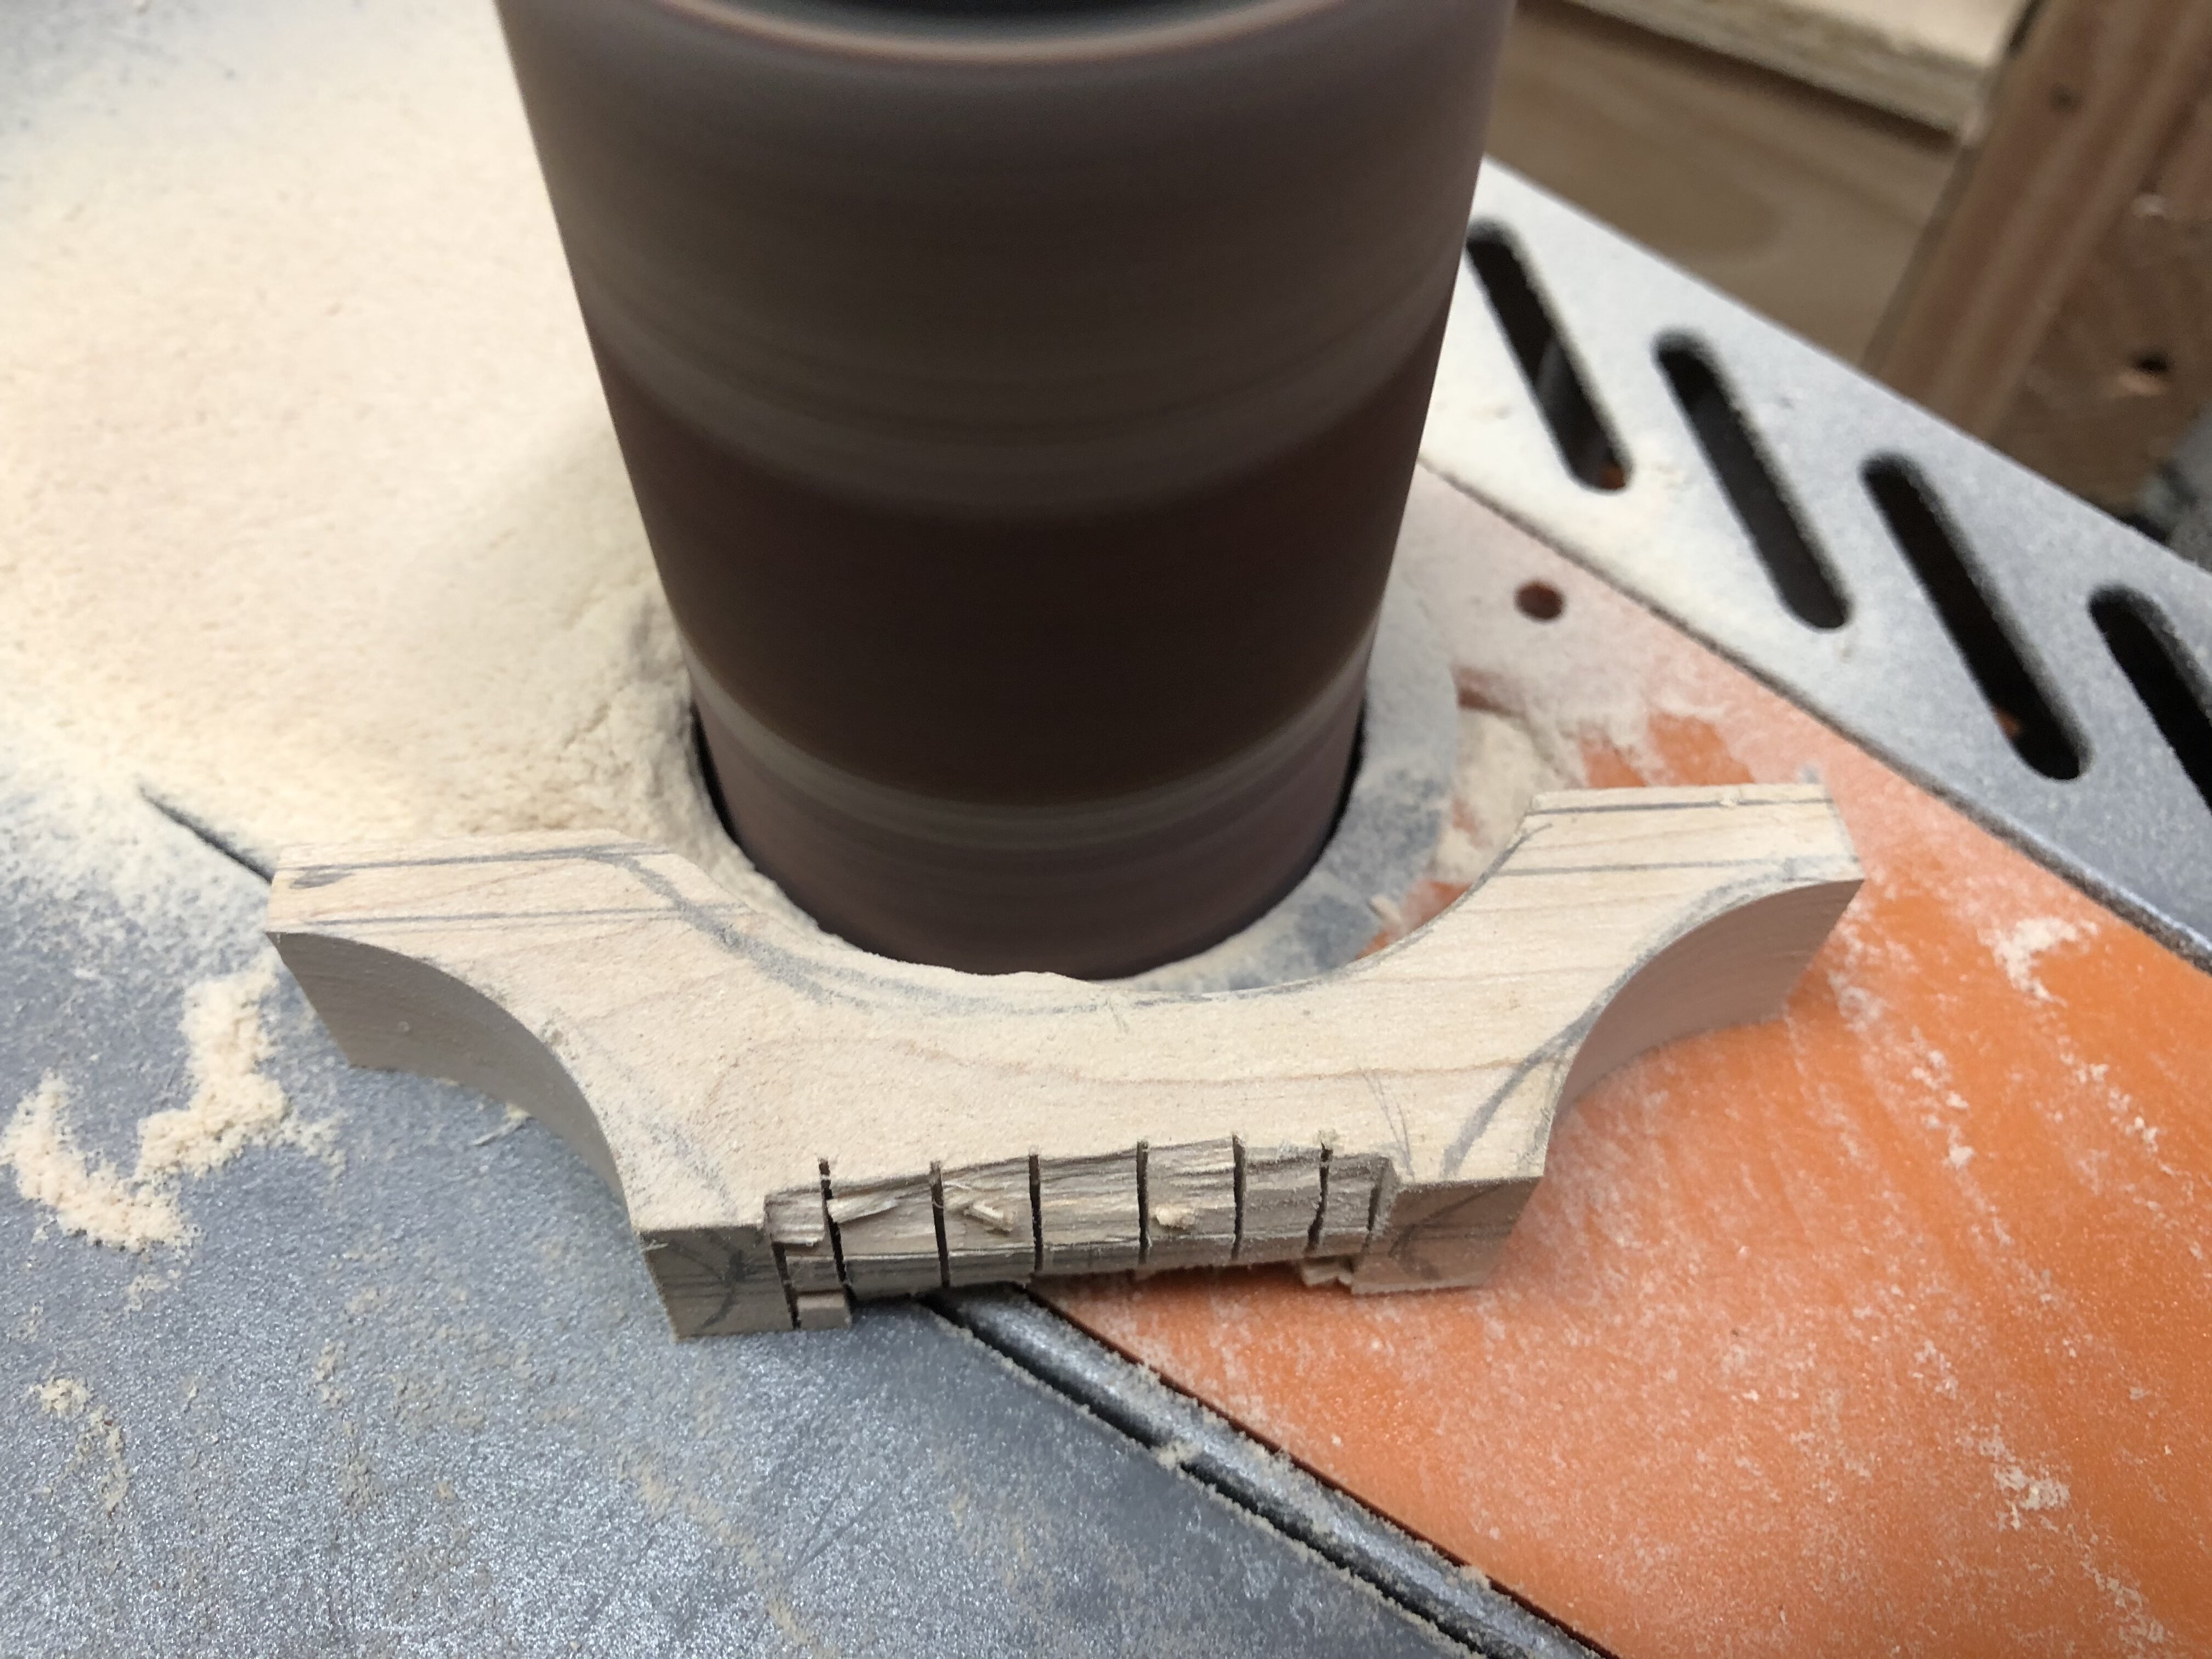
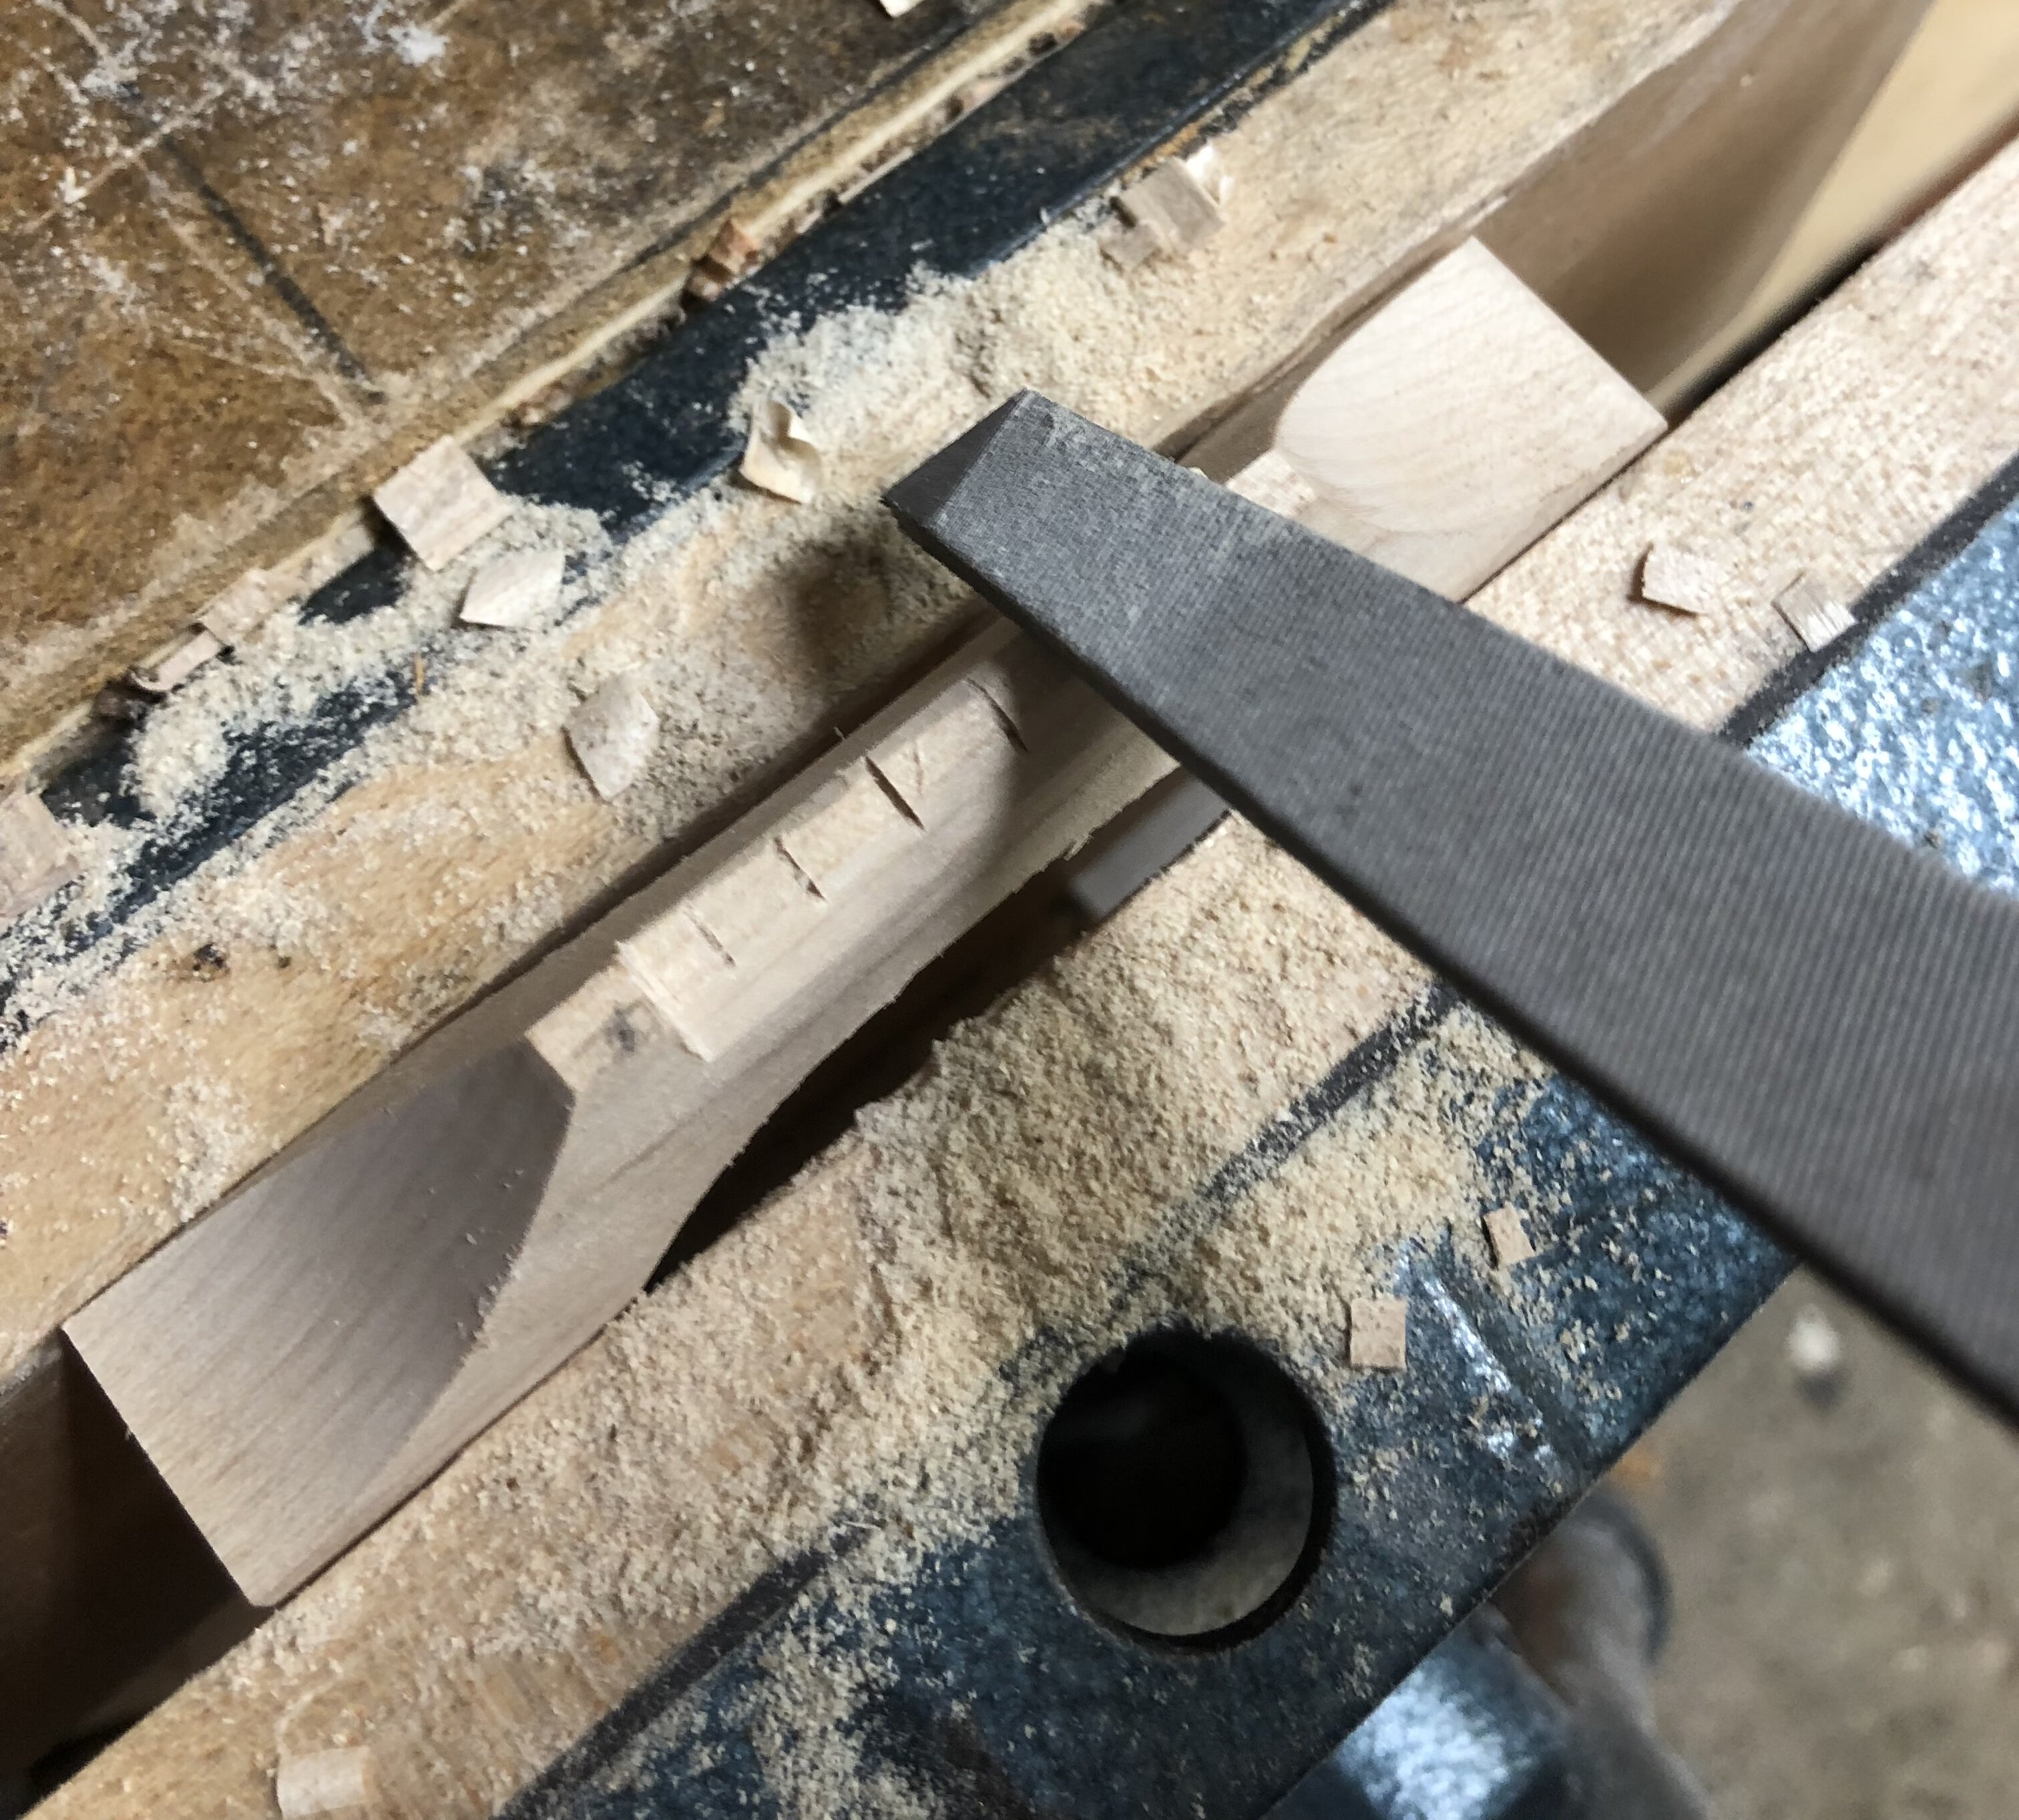
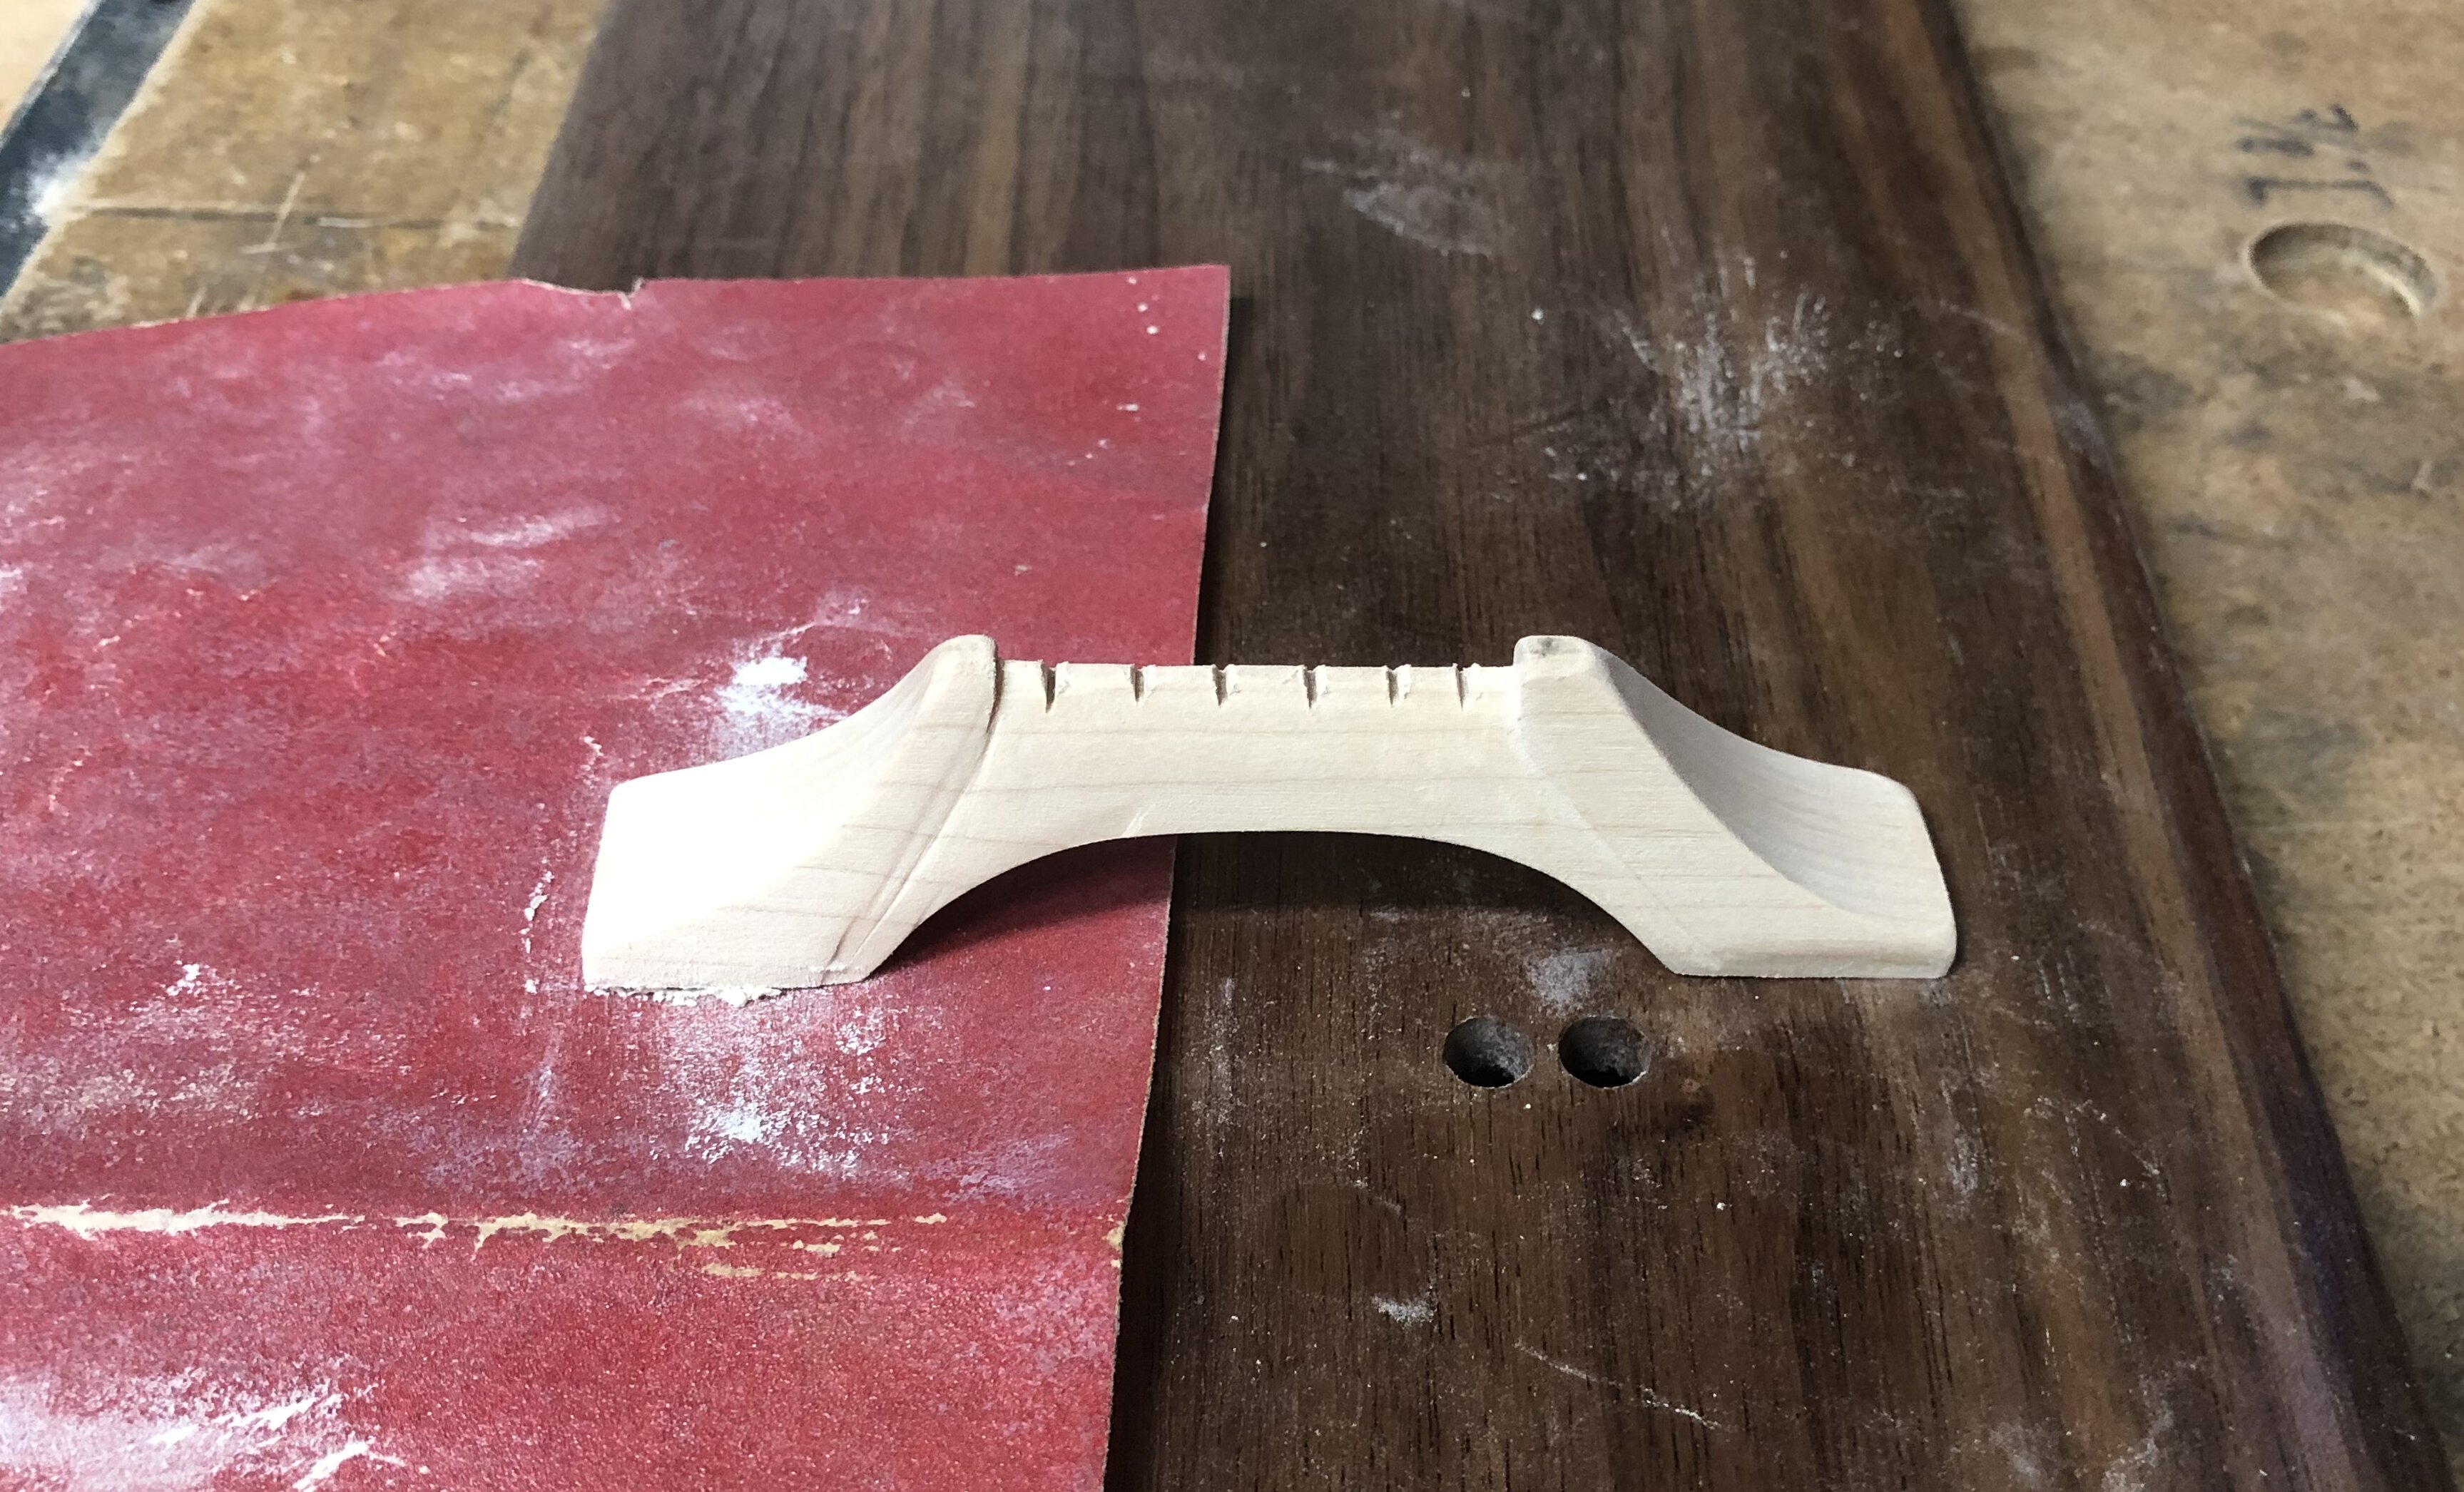
To make the bridge, I start with a hand-drawn sketch of the pattern on a chunk of maple, and rough it out on the bandsaw. Next, I sand everything down to my lines with a spindle sander, followed by some freehand shaping. After that, I do the the rest of the work with a set of good files. I have acquired better files since I made this first bridge, and since I made a few mistakes and plan to re-make the bridge and post updated photos when I do. Specifically, there is too much contact between the strings and the bridge and I think I can get better sound transmission if I fix this.
Finally, you have to fit the bridge to the body of the lyre. My photo shows only half of the process; done properly, the sandpaper goes beneath both feet of the bridge as you rub the bridge against it in very small strokes until it contacts the body of the lyre as completely as possible. You can check this putting a few pencil lines on the bottom fo the bridge before you start sanding. I’ll update this and provide some photos when I make the next bridge. Once your bridge is done, write the orientation on the bottom (e.g. pegs →) so you don’t put it on backwards.


Tailpiece
I’m sticking with the “inverted” theme and chose to make the tailpiece and bridge out of hard maple so its lighter color will contrast with the rest of the instrument. While a number of people use a simple dowel for the tailpiece, I decided to try out a slightly more complex shape.
It is attached with some goatskin rawhide lace, which was soaked in water, twisted and folded back to allow it to twise back upon itself, and then tied off to dry with just a bit of tension to keep it in place (with a dot of super glue on the knots once they were dry). I started with 4 strands per twist but that one broke so I re-made everything with 8 strands and so far it’s holding up well (it’s about 56" or 142cm worth of). I also re-designed my tailpiece slightly to better accommodate the thicker tailgut lace.
The Final Product
I’m mostly done but have been too busy playing to take this outside and get some shots of the finished instrument with a real camera (unlike all of these other photos, which were just taken with my phone).
Links and other reference materials
- David Friedman’s instructions were instrumental in figuring things out.
- Michael J King is a luthier who also sells great tutorials for making your own instruments. He also runs The Lyre group on Facebook.
- There are a lot of links that I haven’t yet transcribed for this page.
Share this post
Bluesky
Twitter
Facebook
Reddit
LinkedIn
Email